使用Dgg全量同步/初始化Initial Load MySQL数据

现有2套MySQL服务器,需要将一台上的服务器上的数据同步到另一台。可以使用Dgg数据同步校准软件实现数据初始化同步的目的。


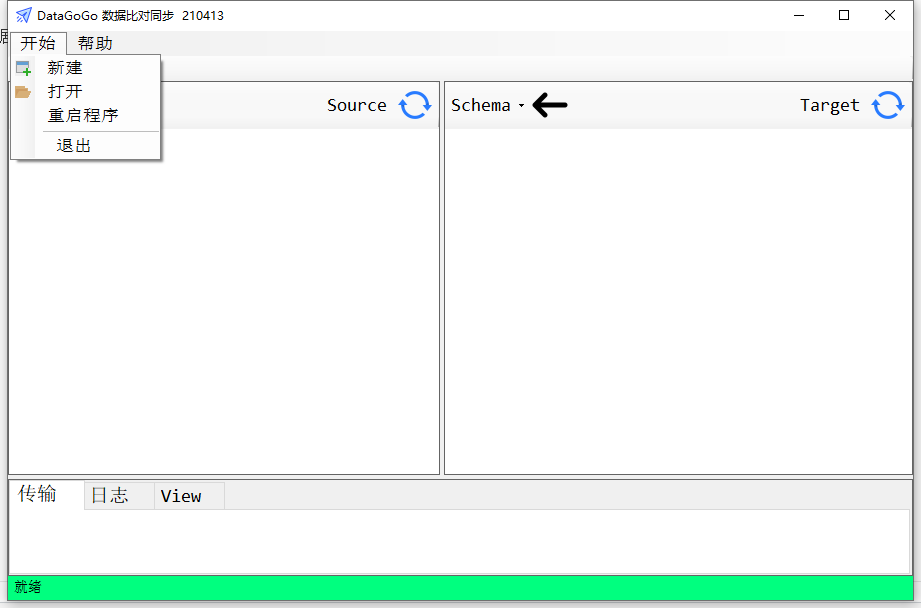
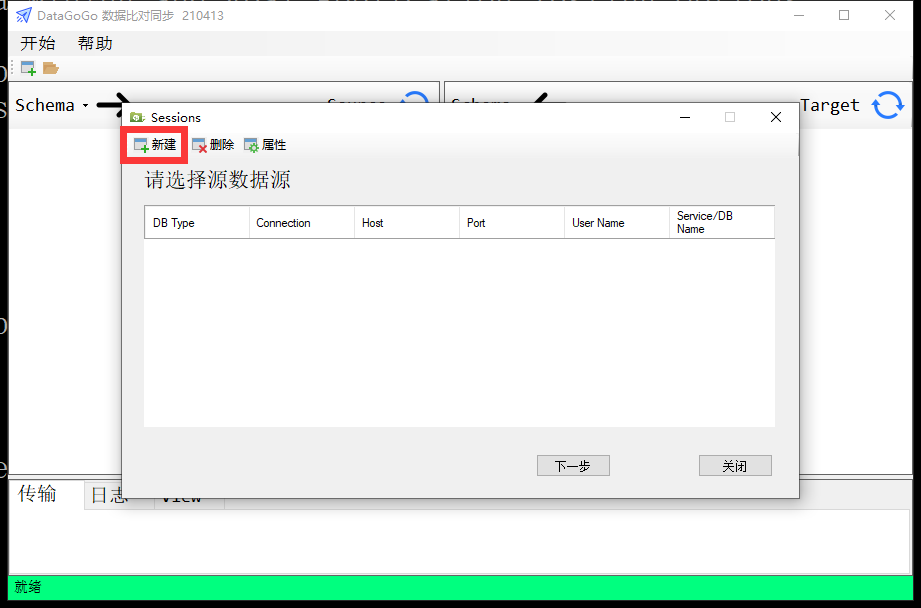
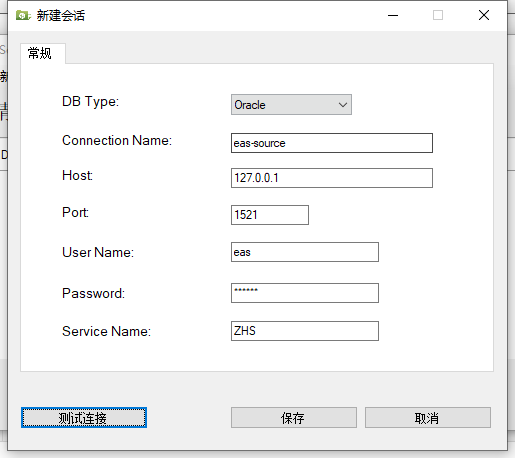
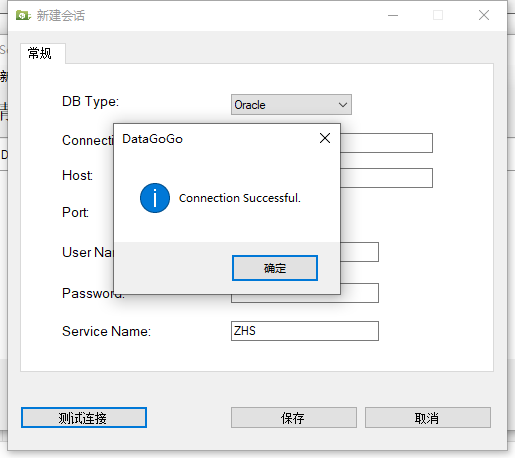
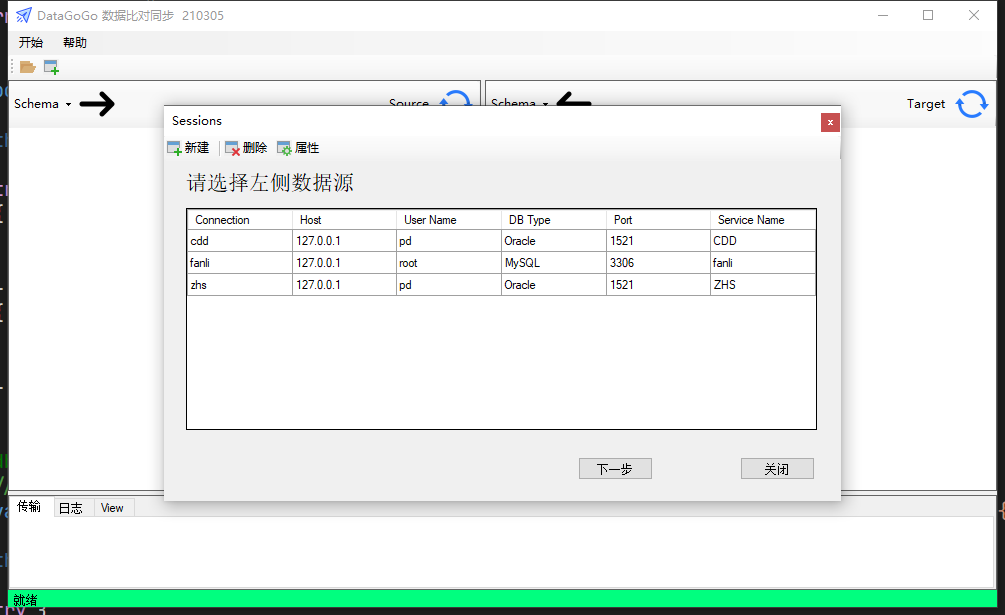
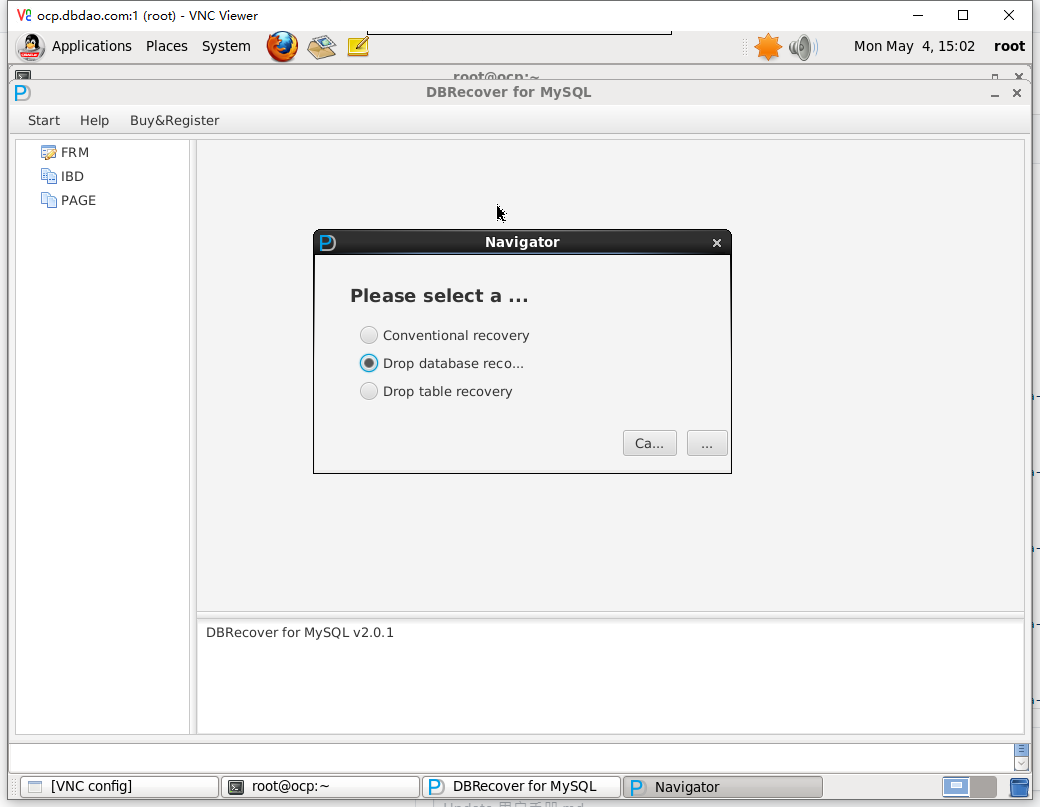
打开Dgg软件,点击开始 => 打开, 创建2个MySQL session:


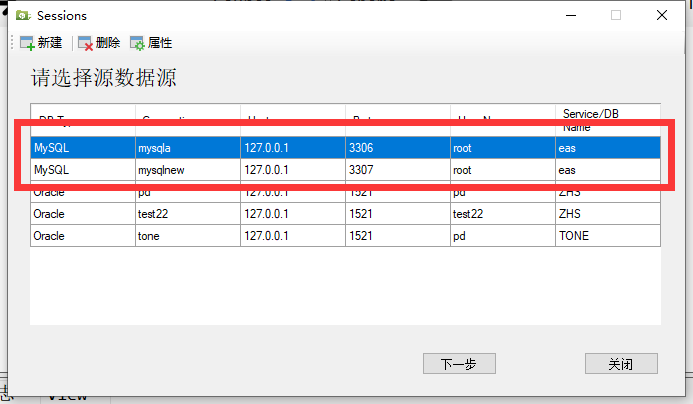
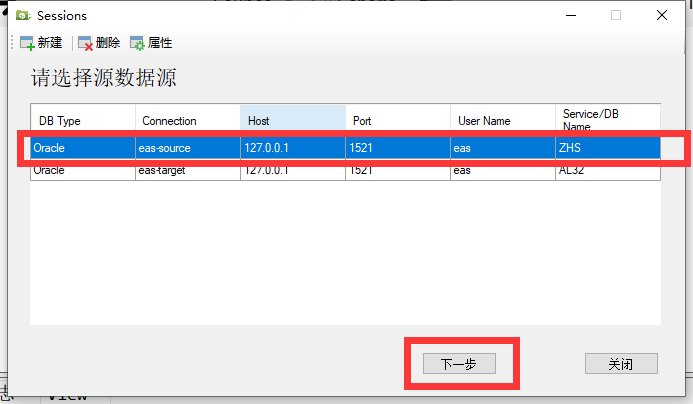
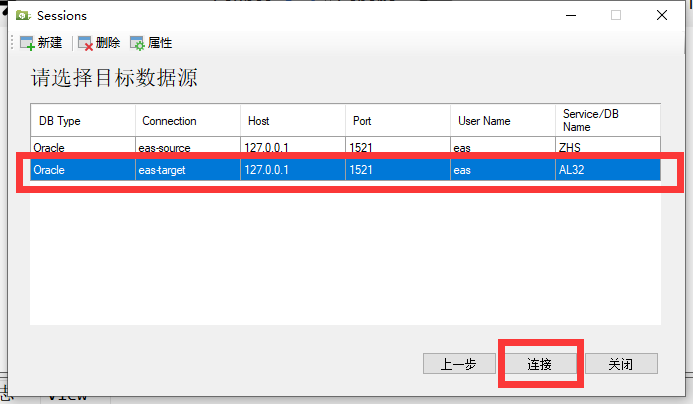
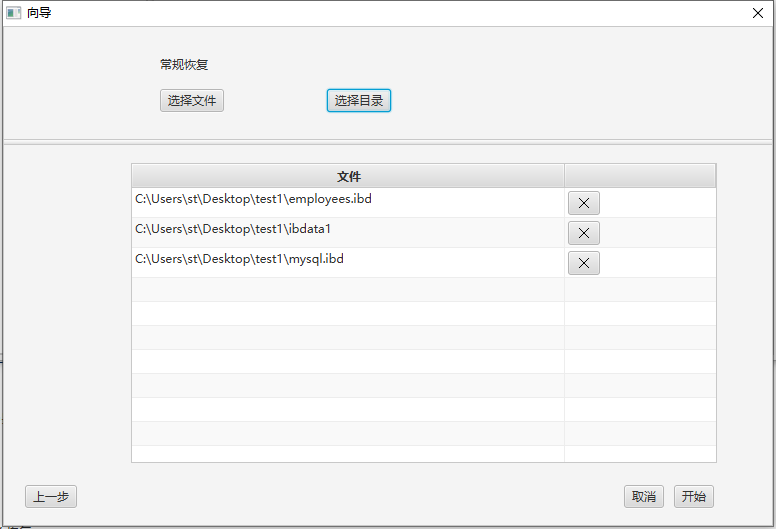
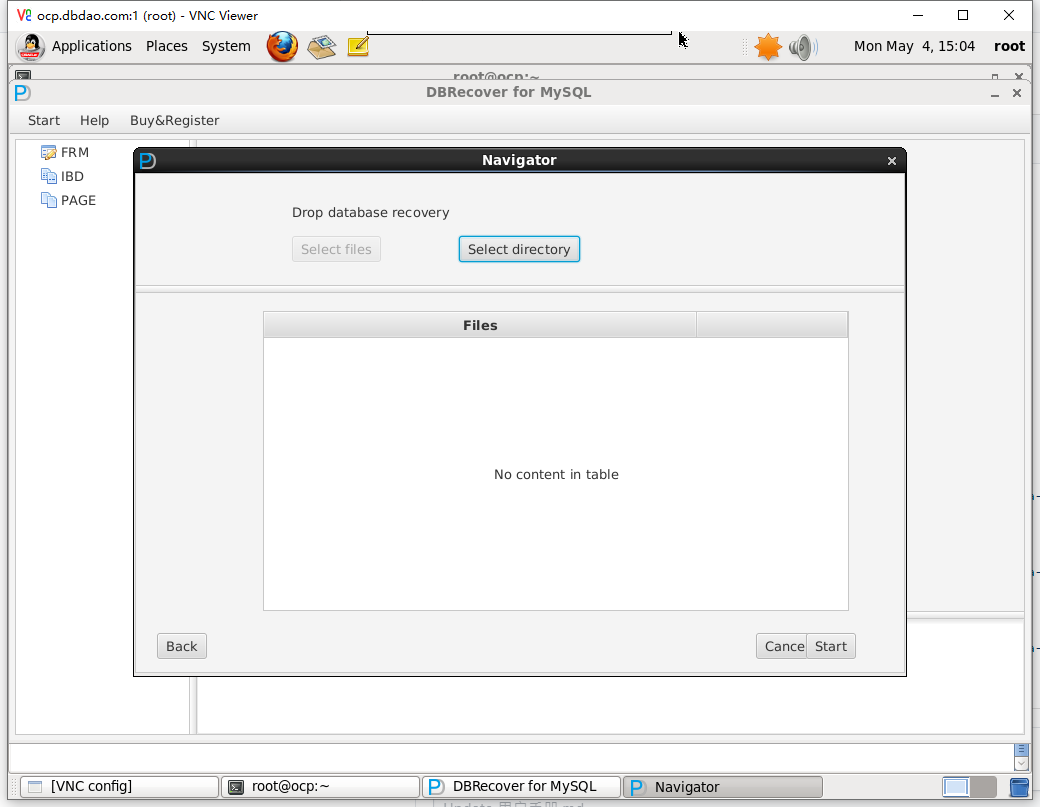
选择源端 并点击下一步,选择目标端 并点击 连接:


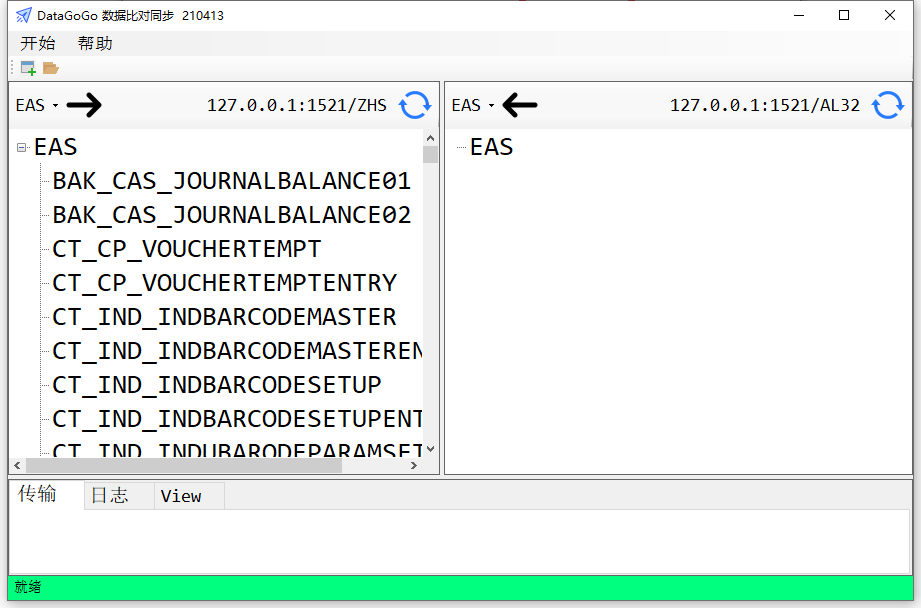
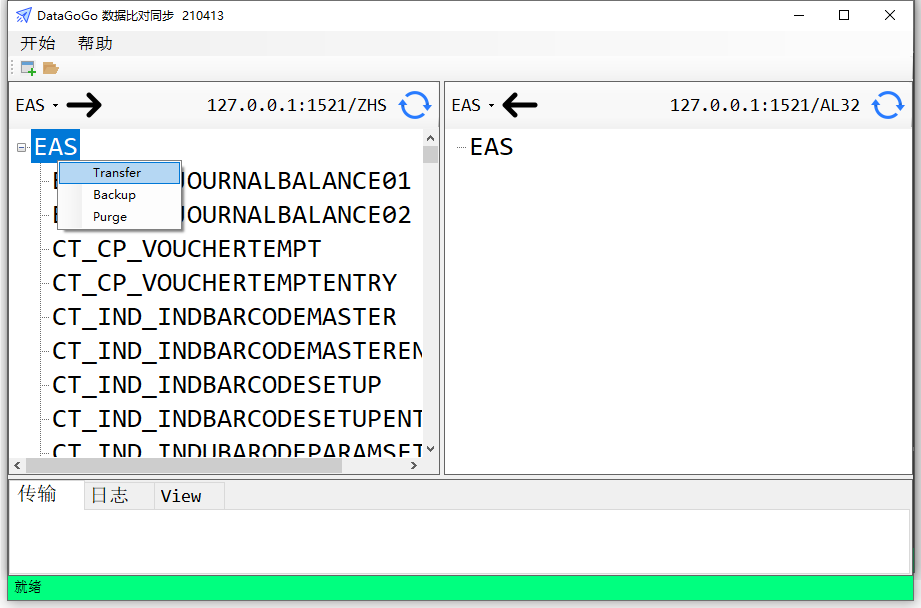
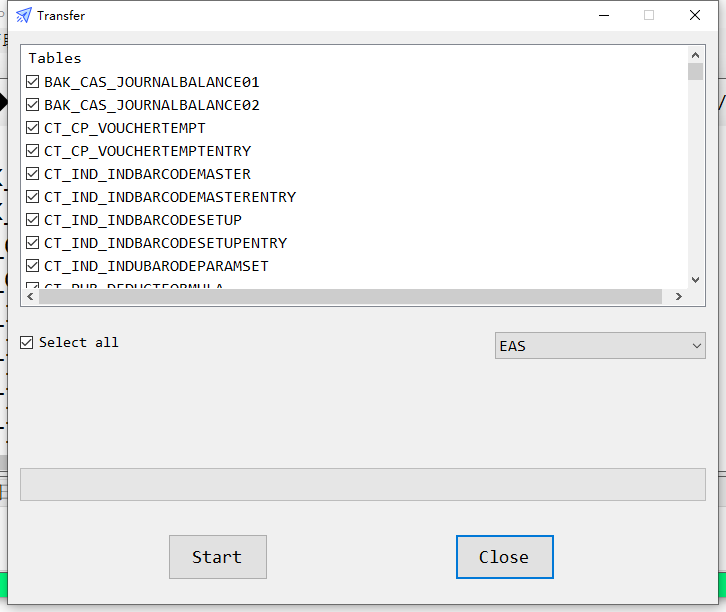
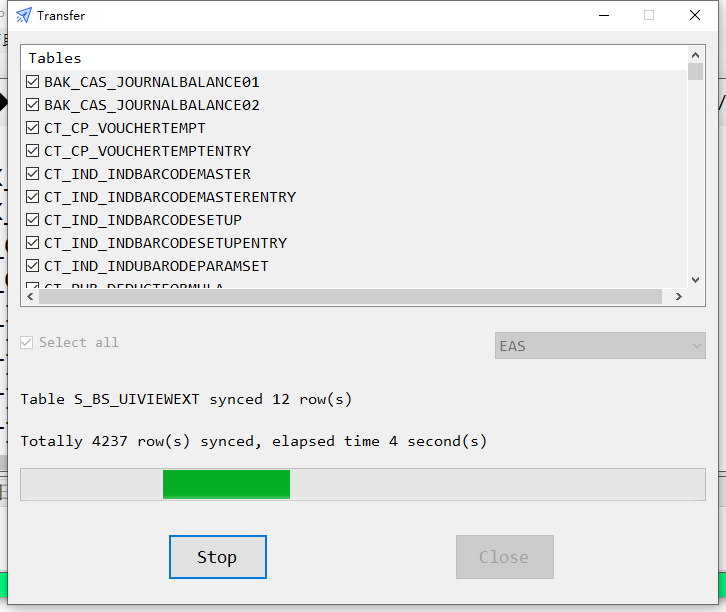
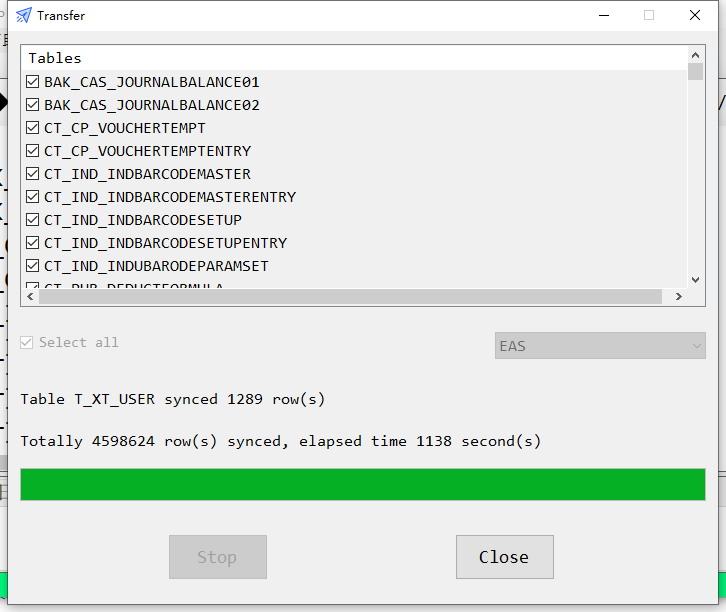
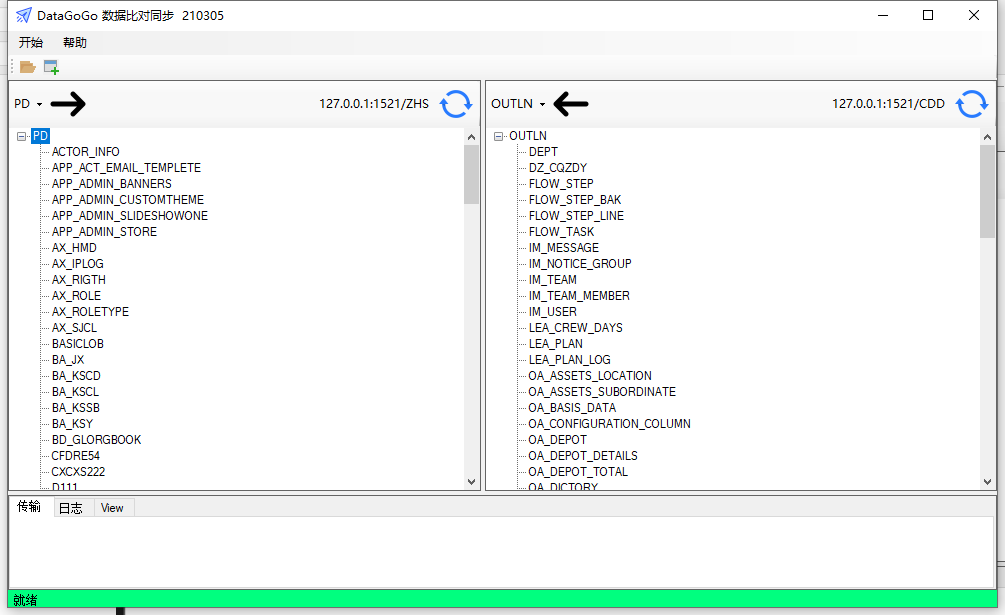
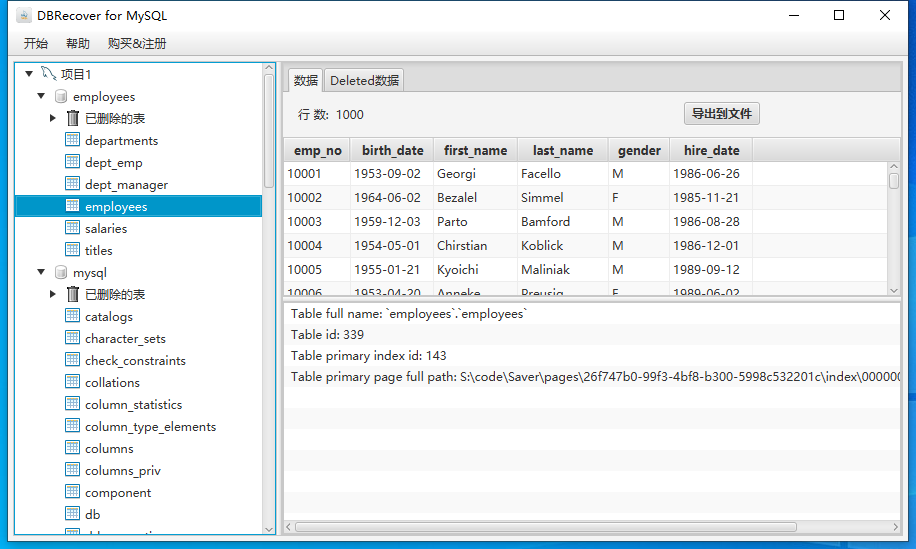
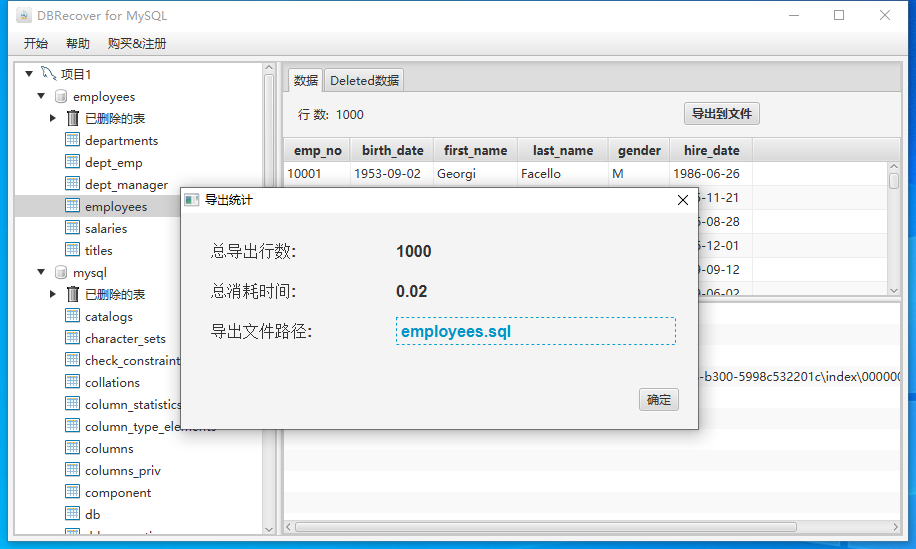
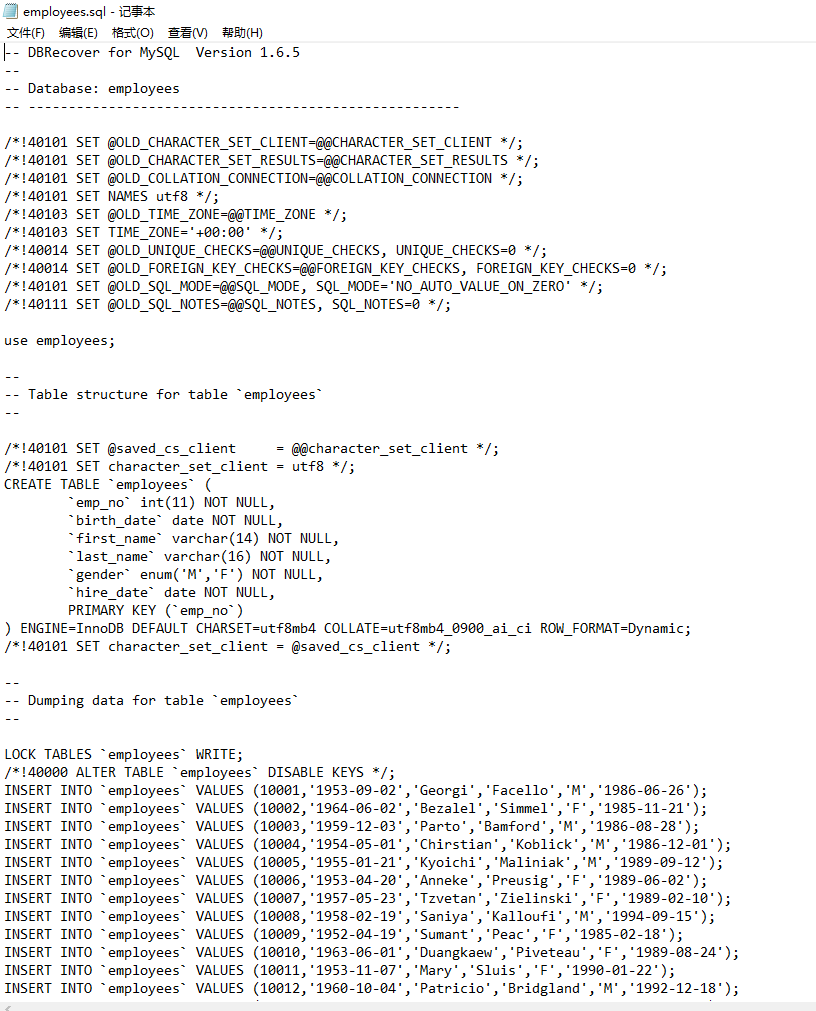
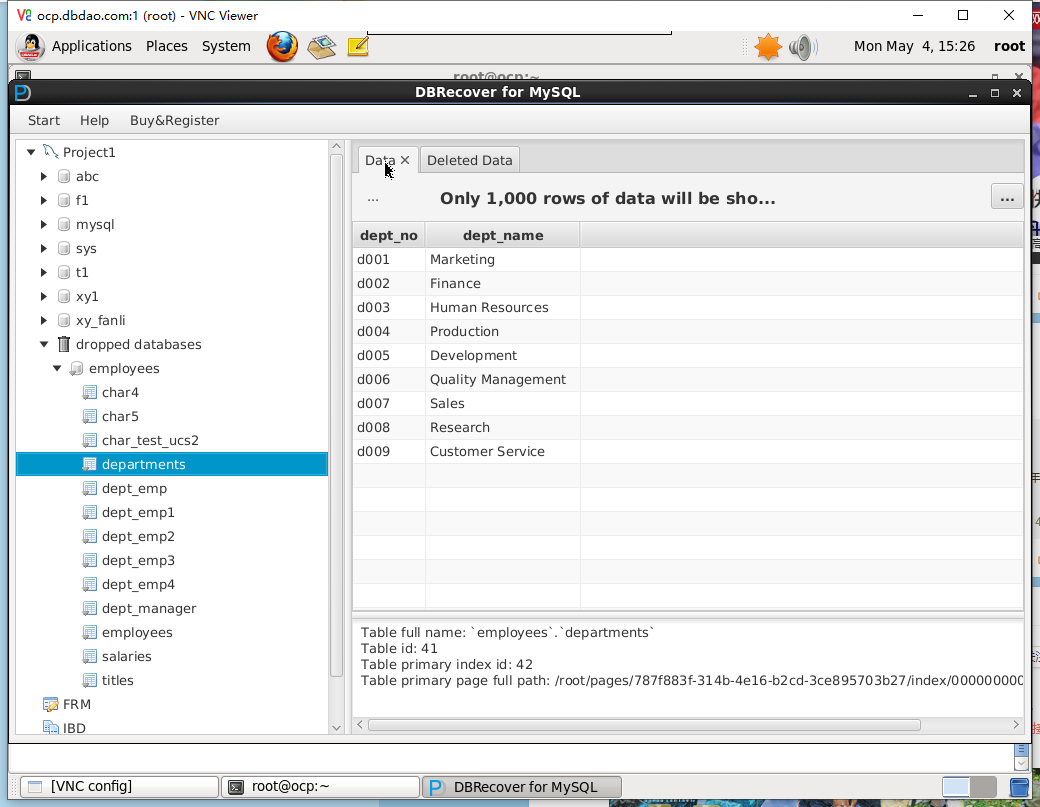
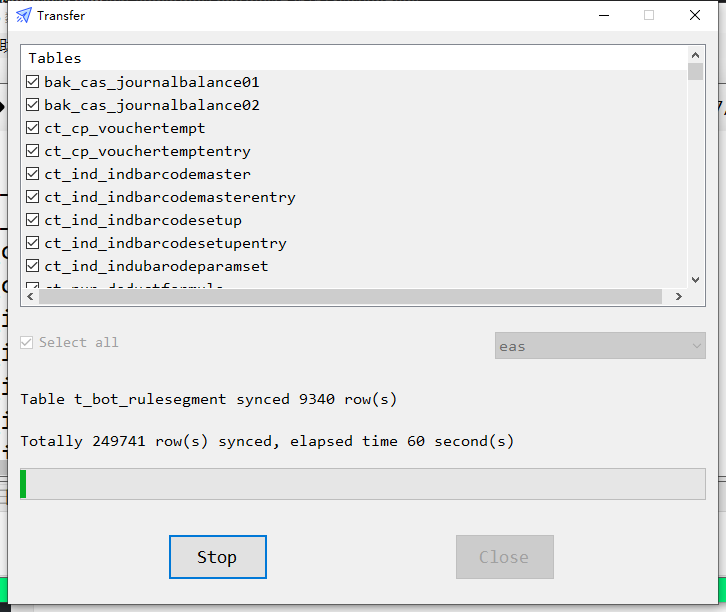
可以在两侧的对象树上看到相关的表 , 点中用户 右键 => Transfer:


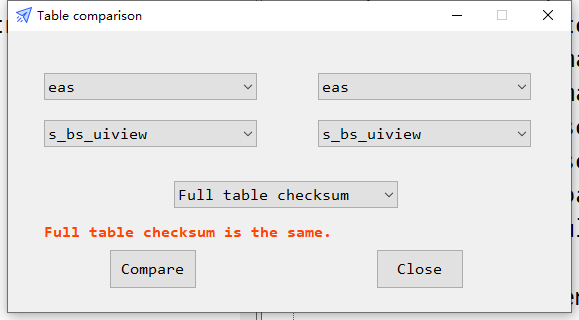
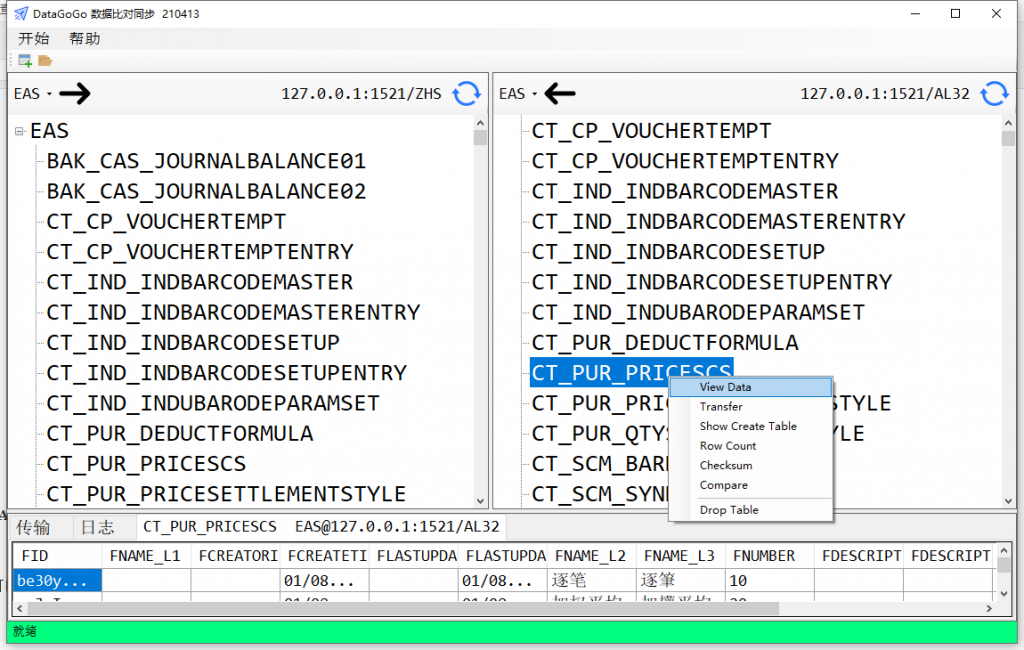
初始化同步后,若对表数据的一致性存在疑问,可以通过Compare功能比对,在左侧树形种点中你要比对的表,右键Compare:
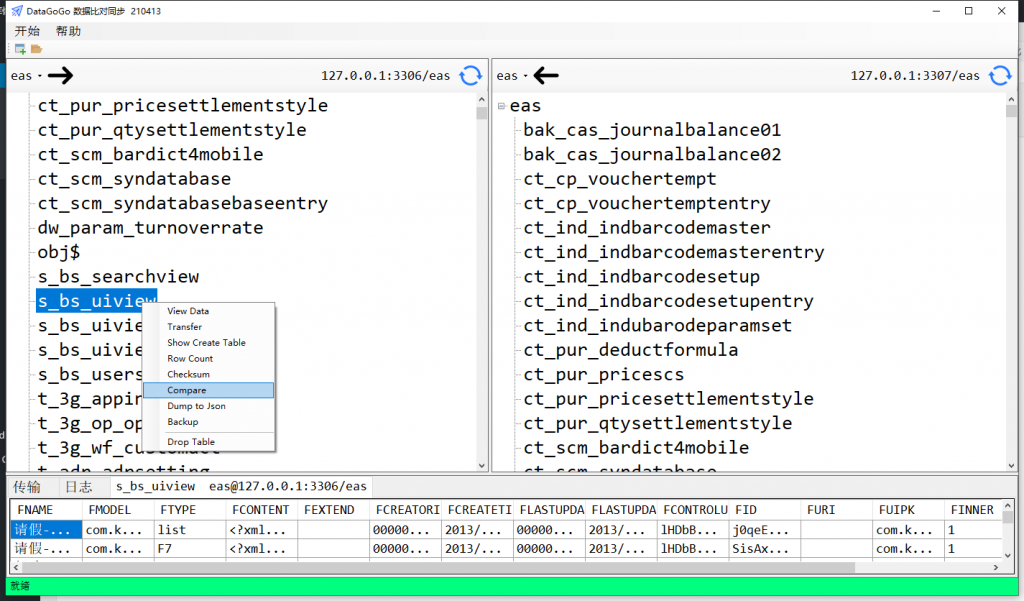
校验分成几种:

  1. 行数对比校验 (最粗粒度)
  2. 主键对比校验  (较粗粒度)
  3. 全表对比校验    (精细粒度)


其中行数对比校验 ,仅对比2个表的行数是否一致;即只比较count(1)

主键比对,只比对主键信息是否一致,支持联合主键

全表校验,比对全表数据信息(会排除TEXT LONGTEXT等长字段列)是否一致


对于小表而言(一般来说小于10万行),全表校验的速度也较快,其时间可接受。对于大表而言,除非是一致性要求极高的账目表,否则建议使用主键比对或行数比对。


Oracle 相比 mysql 的优势在哪里

Oracle 相比 mysql 的优势在哪里   原帖子在这里:  https://v2ex.com/t/773654?p=1


目前的项目用的 mysql,支撑几十亿数据没问题(分库分表),偶尔慢 sql 也能优化索引解决,至于复杂查询通过搜索引擎实现,听说 Oracle 超级贵,那 Oracle 具体有什么优势呢,哪些场景下是 oracle only 的?

看完了回复,oracle 能单表支撑几十亿数据还是很强的,因为目前因为分表键导致很多需求无法实现,只能同步一个表用另一个分表键。

我再问下,如果是同时涉及几十个字段的复杂搜索,oracle 可以支持吗,目前用的搜索引擎实现也非常贵。

有一说一,单表支撑几十亿数据,听着有点玄乎,真的假的啊

我的回复:


oracle 的优化器 CBO optimizer 目前应该是所有 RDBMS 里最复杂的(不说是最先进的)。MYSQL 至少在优化器上还处于比较初级的阶段,虽然 MySQL 的目标可能并不希望实现非常复杂的优化器算法。其他一些东西 例如 undo 的实现等等 可能优势并不明显, 这里就不提了。


举一个例子, 都不使用索引的情况下,NO INDEX ! NO INDEX | NO INDEX !

以下数据量是一样的,机器是同一台。 Oracle 11.2.0.4 MySQL 8.0.14

都没有索引的情况下:oracle 使用 0.04 秒, MySQL 等了 10 分钟也没运行完

对于简单的 SQL 而言,差别不会有那么大。对于复杂的 SQL 而言, 能明显体现出优化器的优势。

对于拔高某个技术,没有兴趣。 所以 MYSQL 死忠请勿拍。

Oracle : 

SQL> set timing on;
SQL> SELECT c.cust_city,
  2         t.calendar_quarter_desc,
  3         SUM(s.amount_sold) sales_amount
  4    FROM sh.sales s, sh.times t, sh.customers c, sh.channels ch
  5   WHERE s.time_id = t.time_id
  6     AND s.cust_id = c.cust_id
  7     AND s.channel_id = ch.channel_id
  8     AND c.cust_state_province = 'FL'
  9     AND ch.channel_desc = 'Direct Sales'
 10     AND t.calendar_quarter_desc IN ('2000-01', '2000-02','1999-12')
 11   GROUP BY c.cust_city, t.calendar_quarter_desc;

CUST_CITY                      CALENDA SALES_AMOUNT
------------------------------ ------- ------------
Cypress Gardens                2000-01      3545.82
Candler                        2000-01      4166.32
Sanibel                        2000-02     17908.67
Ocala                          2000-02      7081.73
Molino                         2000-01     18765.25
Ocala                          2000-01      7146.73
Palmdale                       2000-02     25829.24
Palmdale                       2000-01     37793.44
Molino                         2000-02      17144.7
Saint Marks                    2000-01     55781.37
Noma                           2000-01     33572.55
Evinston                       2000-02     62657.21
Candler                        2000-02      6493.94
Winter Springs                 2000-02           20
Sugarloaf Key                  2000-01     12027.66
Saint Marks                    2000-02      48858.7
Blountstown                    2000-02     38052.58
Sugarloaf Key                  2000-02      9659.44
Cypress Gardens                2000-02      4928.93
Evinston                       2000-01     53509.69
Blountstown                    2000-01      27024.7
Sanibel                        2000-01     15870.34
Winter Springs                 2000-01        31.46
Noma                           2000-02     23903.58

已选择 24 行。

已用时间:  00: 00: 00.04

执行计划
----------------------------------------------------------
Plan hash value: 1865285285

------------------------------------------------------------------------------------------------------------
| Id  | Operation                      | Name      | Rows  | Bytes | Cost (%CPU)| Time     | Pstart| Pstop |
------------------------------------------------------------------------------------------------------------
|   0 | SELECT STATEMENT               |           |   607 | 46132 |   955   (2)| 00:00:12 |       |       |
|   1 |  HASH GROUP BY                 |           |   607 | 46132 |   955   (2)| 00:00:12 |       |       |
|*  2 |   HASH JOIN                    |           |  2337 |   173K|   954   (2)| 00:00:12 |       |       |
|   3 |    PART JOIN FILTER CREATE     | :BF0000   |   274 |  4384 |    18   (0)| 00:00:01 |       |       |
|*  4 |     TABLE ACCESS FULL          | TIMES     |   274 |  4384 |    18   (0)| 00:00:01 |       |       |
|*  5 |    HASH JOIN                   |           | 12456 |   729K|   936   (2)| 00:00:12 |       |       |
|   6 |     MERGE JOIN CARTESIAN       |           |   383 | 14937 |   408   (1)| 00:00:05 |       |       |
|*  7 |      TABLE ACCESS FULL         | CHANNELS  |     1 |    13 |     3   (0)| 00:00:01 |       |       |
|   8 |      BUFFER SORT               |           |   383 |  9958 |   405   (1)| 00:00:05 |       |       |
|*  9 |       TABLE ACCESS FULL        | CUSTOMERS |   383 |  9958 |   405   (1)| 00:00:05 |       |       |
|  10 |     PARTITION RANGE JOIN-FILTER|           |   918K|    18M|   526   (2)| 00:00:07 |:BF0000|:BF0000|
|  11 |      TABLE ACCESS FULL         | SALES     |   918K|    18M|   526   (2)| 00:00:07 |:BF0000|:BF0000|
------------------------------------------------------------------------------------------------------------

Predicate Information (identified by operation id):
---------------------------------------------------

   2 - access("S"."TIME_ID"="T"."TIME_ID")
   4 - filter("T"."CALENDAR_QUARTER_DESC"='1999-12' OR "T"."CALENDAR_QUARTER_DESC"='2000-01' OR
              "T"."CALENDAR_QUARTER_DESC"='2000-02')
   5 - access("S"."CUST_ID"="C"."CUST_ID" AND "S"."CHANNEL_ID"="CH"."CHANNEL_ID")
   7 - filter("CH"."CHANNEL_DESC"='Direct Sales')
   9 - filter("C"."CUST_STATE_PROVINCE"='FL')


统计信息
----------------------------------------------------------
          0  recursive calls
          0  db block gets
       1726  consistent gets
          0  physical reads
          0  redo size
       1495  bytes sent via SQL*Net to client
        531  bytes received via SQL*Net from client
          3  SQL*Net roundtrips to/from client
          1  sorts (memory)
          0  sorts (disk)
         24  rows processed


SQL> select count(*) from sh.sales;

  COUNT(*)
----------
    918843

SQL> select * From v$VERSION;

BANNER
--------------------------------------------------------------------------------
Oracle Database 11g Enterprise Edition Release 11.2.0.4.0 - 64bit Production
PL/SQL Release 11.2.0.4.0 - Production
CORE    11.2.0.4.0      Production
TNS for 64-bit Windows: Version 11.2.0.4.0 - Production
NLSRTL Version 11.2.0.4.0 - Production

MySQL :

mysql> SELECT c.cust_city,
    ->        t.calendar_quarter_desc,
    ->        SUM(s.amount_sold) sales_amount
    ->   FROM sh.sales s, sh.times t, sh.customers c, sh.channels ch
    ->  WHERE s.time_id = t.time_id
    ->    AND s.cust_id = c.cust_id
    ->    AND s.channel_id = ch.channel_id
    ->    AND c.cust_state_province = 'FL'
    ->    AND ch.channel_desc = 'Direct Sales'
    ->    AND t.calendar_quarter_desc IN ('2000-01', '2000-02','1999-12')
    ->  GROUP BY c.cust_city, t.calendar_quarter_desc;


+----+-------------+-------+------------+------+---------------+------+---------+------+--------+----------+----------------------------------------------------+
| id | select_type | table | partitions | type | possible_keys | key  | key_len | ref  | rows   | filtered | Extra                                              |
+----+-------------+-------+------------+------+---------------+------+---------+------+--------+----------+----------------------------------------------------+
|  1 | SIMPLE      | ch    | NULL       | ALL  | NULL          | NULL | NULL    | NULL |      5 |    20.00 | Using where; Using temporary                       |
|  1 | SIMPLE      | t     | NULL       | ALL  | NULL          | NULL | NULL    | NULL |   1804 |    30.00 | Using where; Using join buffer (Block Nested Loop) |
|  1 | SIMPLE      | c     | NULL       | ALL  | NULL          | NULL | NULL    | NULL |  55065 |    10.00 | Using where; Using join buffer (Block Nested Loop) |
|  1 | SIMPLE      | s     | NULL       | ALL  | NULL          | NULL | NULL    | NULL | 914584 |     0.10 | Using where; Using join buffer (Block Nested Loop) |
+----+-------------+-------+------------+------+---------------+------+---------+------+--------+----------+----------------------------------------------------+


mysql> select version();
+-----------+
| version() |
+-----------+
| 8.0.14    |
+-----------+
1 row in set (0.00 sec)

mysql> select count(*) from sh.sales;
+----------+
| count(*) |
+----------+
|   918843 |
+----------+
1 row in set (0.96 sec)

使用Dgg全量同步/初始化Initial Load Oracle数据

现有ZHS和AL2套数据库,需要将ZHS下的EAS Schema数据初始化复制到AL数据库。

准备工作: 在AL数据库中对应创建EAS用户,并赋权:


set ORACLE_SID=AL

sqlplus / as sysdba

create user eas identified by eas;
grant connect,resource to eas;


打开DataGoGo.exe 点击开始


点击新建:


输入数据源ZHS实例的连接信息:

点击测试连接:


点击保存后, 再次新建目标数据库连接:


选中源数据源,点击下一步:


选中目标数据源,点击连接


连接后,会在左右2侧显示对象树形图:


选中用户名,右键点中,点击Transfer:


出现Schema 传输界面,默认选中了所有表


点击Start后开始Schema用户级别数据传输,传输过程中 会显示传输进度:


在有NVARCHAR、LOB(BLOB CLOB NCLOB)字段的情况下,DataGoGo的单线程传输速度约为4500条/秒。

在没有NVARCHAR、LOB(BLOB CLOB NCLOB)字段的情况下,DataGoGo的单线程传输速度约为30000条/秒。

点击Close后,可以在右侧树形图看到传输过来的表:


Dgg Oracle/MySQL数据库复制同步校准软件

Dgg Oracle/MySQL数据库复制同步校准软件

Dgg Rdbms Oracle MySQL Table/Schema Sync Compare Repair

最新版:


Dgg is a single application that allows you to tranfer data between Oracle and MySQL.
It will also support Microsoft SQL Server in future.

It supports below directionals:

Oracle To Oracle
Oracle To MySQL
MySQL To MySQL
MySQL To Oracle

特性:

快速比较同步Oracle表数据
快速比较同步MySQL表数据
支持异构传输 Oracle <=> MySQL , 未来将支持 SQL Server
将支持快速数据表校准修复
将支持索引、视图、触发器等其他类型对象


Dgg Oracle MySQL数据同步校准工具最新版:https://zcdn.askmac.cn/Dgg2110.zip


软件产品更新下载


DBRECOVER for Oracle恢复工具最新版: https://www.parnassusdata.com/zh-hans/node/1343

DBRECOVER for MySQL恢复工具最新版:https://www.parnassusdata.com/zh-hans/node/1343

DSR For Oracle 恢复工具最新版:https://www.parnassusdata.com/zh-hans/node/1343


MySQLGlance一个轻量级MySQL性能监控工具

MySQLGlance是免费的,你可以安心使用它。

MySQLGlance is free software , use it as you like.


下载地址URL:https://zcdn.askmac.cn/MySQLGlance2103.zip


2021-03-04 :  mysqlglance对ssl的要求降低为NONE


MySQLGlance的目标


  • 完全免费
  • 一键即运行的图形化MySQL数据库性能监控软件
  • 无需安装、部署,不占用服务器资源
  • 目前支持MySQL 5.7  和 8.0
  • 非植入式,对MySQL 只读,不在数据库内创建任何对象
  • 资源占用极低,内存使用在50MB左右,CPU占用率极低
  • 无需外网访问权限,纯本地程序,不上传任何数据到任何服务器


仅需以下权限:


grant select on performance_schema.* to $USERNAME;
grant select,execute on sys.* to $USERNAME;
grant process on *.* to $USERNAME;
flush privileges;


DBRECOVER for MySQL 在Linux 7上启动失败问题:Graphics Device initialization failed for : es2, sw

症状为使用mobaxterm 登录操作系统后,DBRECOVER for MySQL 在Linux 7上启动失败,GUI无法启动,日志报错为:


[root@ora7 dbrecover-for-mysql-2006]# less dbrecover-for-mysql.log.txt


Graphics Device initialization failed for :  es2, sw
Error initializing QuantumRenderer: no suitable pipeline found
java.lang.RuntimeException: java.lang.RuntimeException: Error initializing QuantumRenderer: no suitable pipeline found
        at com.sun.javafx.tk.quantum.QuantumRenderer.getInstance(QuantumRenderer.java:280)
        at com.sun.javafx.tk.quantum.QuantumToolkit.init(QuantumToolkit.java:221)
        at com.sun.javafx.tk.Toolkit.getToolkit(Toolkit.java:248)
        at com.sun.javafx.application.PlatformImpl.startup(PlatformImpl.java:209)
        at com.sun.javafx.application.LauncherImpl.startToolkit(LauncherImpl.java:675)
        at com.sun.javafx.application.LauncherImpl.launchApplicationWithArgs(LauncherImpl.java:337)
        at com.sun.javafx.application.LauncherImpl.launchApplication(LauncherImpl.java:328)
        at sun.reflect.NativeMethodAccessorImpl.invoke0(Native Method)
        at sun.reflect.NativeMethodAccessorImpl.invoke(NativeMethodAccessorImpl.java:62)
        at sun.reflect.DelegatingMethodAccessorImpl.invoke(DelegatingMethodAccessorImpl.java:43)
        at java.lang.reflect.Method.invoke(Method.java:498)
        at sun.launcher.LauncherHelper$FXHelper.main(LauncherHelper.java:767)
Caused by: java.lang.RuntimeException: Error initializing QuantumRenderer: no suitable pipeline found
        at com.sun.javafx.tk.quantum.QuantumRenderer$PipelineRunnable.init(QuantumRenderer.java:94)
        at com.sun.javafx.tk.quantum.QuantumRenderer$PipelineRunnable.run(QuantumRenderer.java:124)
        at java.lang.Thread.run(Thread.java:748)
Exception in thread "main" java.lang.reflect.InvocationTargetException
        at sun.reflect.NativeMethodAccessorImpl.invoke0(Native Method)
        at sun.reflect.NativeMethodAccessorImpl.invoke(NativeMethodAccessorImpl.java:62)
        at sun.reflect.DelegatingMethodAccessorImpl.invoke(DelegatingMethodAccessorImpl.java:43)
        at java.lang.reflect.Method.invoke(Method.java:498)
        at sun.launcher.LauncherHelper$FXHelper.main(LauncherHelper.java:767)
Caused by: java.lang.RuntimeException: No toolkit found
        at com.sun.javafx.tk.Toolkit.getToolkit(Toolkit.java:260)
        at com.sun.javafx.application.PlatformImpl.startup(PlatformImpl.java:209)
        at com.sun.javafx.application.LauncherImpl.startToolkit(LauncherImpl.java:675)
        at com.sun.javafx.application.LauncherImpl.launchApplicationWithArgs(LauncherImpl.java:337)
        at com.sun.javafx.application.LauncherImpl.launchApplication(LauncherImpl.java:328)
        ... 5 more


这是因为gtk 2没有安装导致的;虽然没装gtk2,但是可以启动xclock。

解决方法为,安装gtk2和libXtst.x86_64:

yum install gtk2 libXtst.x86_64 xclock  xorg-x11-xauth.x86_64 unzip


Loaded plugins: fastestmirror, langpacks
Loading mirror speeds from cached hostfile
 * base: mirrors.aliyun.com
 * extras: mirrors.aliyun.com
 * updates: mirrors.aliyun.com
base                                                                                                                                                                                             | 3.6 kB  00:00:00
extras                                                                                                                                                                                           | 2.9 kB  00:00:00
updates                                                                                                                                                                                          | 2.9 kB  00:00:00
(1/2): extras/7/x86_64/primary_db                                                                                                                                                                | 205 kB  00:00:00
(2/2): updates/7/x86_64/primary_db                                                                                                                                                               | 3.0 MB  00:00:00
Resolving Dependencies
--> Running transaction check
---> Package gtk2.x86_64 0:2.24.31-1.el7 will be installed
--> Finished Dependency Resolution


DBRECOVER FOR MYSQL 用户手册

DBRECOVER FOR MYSQL是一个MySQL数据库(Innodb)恢复工具,该工具软件可以在MySQL没有备份的情况下,针对实例崩溃,Inoodb字典损坏无法启动数据库实例,DROP DATABASE,DROP TABLE,TRUNCATE TABLE,DELETE TABLE,磁盘/文件系统损坏等场景恢复数据库数据。


下载连接:https://zcdn.parnassusdata.com/dbrecover-for-mysql-2006.zip

视频教程:


  • 使用DBRECOVER恢复MySQL中被drop的database https://zcdn.parnassusdata.com/dbrecover-for-mysql-recover-case-drop-database.mp4
  • 使用DBRECOVER恢复奔溃的无法打开的MYSQL实例 https://zcdn.parnassusdata.com/dbrecover-for-mysql-recover-case-crash-instance.mp4
  • 使用DBRECOVER读取mySQL中单个frm和ibd文件中的数据 https://zcdn.parnassusdata.com/dbrecover-for-mysql-read-single-ibd-frm.mp4
  • 使用DBRECOVER恢复MySQL中被使用SQL DELETE删除的数据 https://zcdn.parnassusdata.com/dbrecover%20for%20mysql%20undelete%20records.mp4
  • 使用DBRECOVER恢复MySQL的最简单例子 https://zcdn.parnassusdata.com/dbrecover%20for%20mysql%20quick%20recovery.mp4
  • 使用DBRECOVER恢复MYSQL中被使用SQL DELETE删除的数据 https://zcdn.parnassusdata.com/dbrecover-for-mysql-drop-truncate-table-test.mp4
  • 使用DBRECOVER恢复因磁盘或文件系统故障而导致不可用的MySQL实例中的数据 https://zcdn.parnassusdata.com/dbrecover-for-mysql-filesystem-disk-failure-recovery.mp4


特性:

  • 图形化界面操作,无需学习命令行
  • 支持版本覆盖MYSQL 5.1 到 MySQL 8.0(2020年5月),支持MYSQL 8.0的全新数据字典结构
  • 支持INNODB存储引擎, MYISAM支持仍在开发中
  • 支持各种故障导致的MYSQL实例崩溃下的数据恢复
  • 恢复结果为MYSQLDUMP格式的SQL文件
  • 支持对DELETE 操作的数据行恢复
  • 支持对DROP TABLE, TRUNCATE TABLE 操作的表恢复
  • 支持对DROP DataBase操作的数据库恢复
  • 支持因磁盘故障/文件系统损坏等情况下的恢复
  • 免费版支持每张表抽取1000行数据,每张表抽取100行被delete的数据
  • 基于JAVA开发,支持Windows/Redhat/Centos/Ubuntu等操作系统
  • 支持对FRM文件的恢复,将FRM文件解析为CREATE TABLE的SQL语句
  • 支持对LOB/TEXT等大对象的恢复


针对MySQL数据库无法打开的场景的恢复


此场景下用户尝试启动MySQL实例,但MySQL实例可能因数据库本身损坏而CRASH进程崩溃。

相关报错可能如下:


InnoDB: Waiting for the background threads to start
InnoDB: Error: tablespace size stored in header is 3712 pages, but
InnoDB: the sum of data file sizes is only 3072 pages
InnoDB: Cannot start InnoDB. The tail of the system tablespace is
InnoDB: missing. Have you edited innodb_data_file_path in my.cnf in an
InnoDB: inappropriate way, removing ibdata files from there?
InnoDB: You can set innodb_force_recovery=1 in my.cnf to force
InnoDB: a startup if you are trying to recover a badly corrupt database.


InnoDB: Assertion failure in thread 3876 in file ha_innodb.cc line 17352
InnoDB: We intentionally generate a memory trap.
InnoDB: Submit a detailed bug report to http://bugs.mysql.com.
InnoDB: If you get repeated assertion failures or crashes, even
InnoDB: immediately after the mysqld startup, there may be
InnoDB: corruption in the InnoDB tablespace. Please refer to
InnoDB: http://dev.mysql.com/doc/refman/5.6/en/forcing-innodb-recovery.html
InnoDB: about forcing recovery.


InnoDB: Assertion failure in thread 140154354255616 in file trx0purge.c line 848
InnoDB: Failing assertion: purge_sys->purge_trx_no <= purge_sys->rseg->last_trx_no
InnoDB: We intentionally generate a memory trap.


InnoDB: Your database may be corrupt or you may have copied the InnoDB tablespace but not the InnoDB log files. Please refer to http://dev.mysql.com/doc/refman/5.7/en/forcing-innodb-recovery.html for information about forcing recovery


[ERROR] InnoDB: Attempted to open a previously opened tablespace. Previous tablespace database/table uses space ID: 882 at filepath

[Note] InnoDB: Starting crash recovery.
[ERROR] InnoDB: Tablespace 11904 was not found at ./example_db/example1.ibd.
[ERROR] InnoDB: Set innodb_force_recovery=1 to ignore this and to permanently lose all changes to the tablespace.
[ERROR] InnoDB: Tablespace 11905 was not found at ./example_db/example2.ibd.
[ERROR] InnoDB: Cannot continue operation.


InnoDB: Error: space header page consists of zero bytes in data file ./ibdata1

InnoDB: Database page corruption on disk or a failed file read of page 660. A table cannot be properly queried with the SELECT statement - additional possible output: MariaDB [psa]> select * from db_example.misc;
ERROR 2006 (HY000): MySQL server has gone away No connection. Trying to reconnect...

  1. 建议首先将MYSQL实例关闭
  2. 在Windows下双击文件start_dbrecover_mysql.bat启动程序
  3. 在Linux下运行./start_dbrecover_mysql.sh启动程序(请确认在Linux上已安装这些包gtk2 libXtst.x86_64 xclock xorg-x11-xauth.x86_64 unzip: Centos 上yum install gtk2 libXtst.x86_64 xclock xorg-x11-xauth.x86_64 unzip),推荐使用mobaxterm程序来启动远程图形化(https://zcdn.askmac.cn/MobaXterm_Portable_v20.2.zip)
  4. 选择常规模式
  5. 选择对应的MYSQL版本,PageSize一般保持默认即可
  6. 点击选择目录,将MySQL数据文件夹所在目录加入,点击开始
  7. 在数据库树形图中选择你需要的表,双击可以浏览数据,此处最多显示1000行数据
  8. 点击导出到文件,会将该表的数据以MYSQLDUMP形式存放到SQL文件中
  9. 点击导出文件路径,可直达文件目录,其内容如下图
  10. 文件包含建表语句,和插入语句,使用mysql -uroot -p < 导出文件.sql 导入数据。


mysql -uroot -p < employees.sql
Enter password: ********


mysql -uroot -p
Enter password: ********
Welcome to the MySQL monitor.  Commands end with ; or \g.
Your MySQL connection id is 13
Server version: 8.0.14 MySQL Community Server - GPL

Copyright (c) 2000, 2019, Oracle and/or its affiliates. All rights reserved.

Oracle is a registered trademark of Oracle Corporation and/or its
affiliates. Other names may be trademarks of their respective
owners.

Type 'help;' or '\h' for help. Type '\c' to clear the current input statement.

mysql> use  employees;
Database changed

mysql> select count(*) from employees;
+----------+
| count(*) |
+----------+
|     1000 |
+----------+
1 row in set (0.00 sec)

针对drop database场景的恢复


mysql> drop database employees;
Query OK, 14 rows affected (0.16 sec)

#sync
#sync


启动DBRECOVER FOR MYSQL软件,选择DROP DATABASE恢复场景:


选择正确的MYSQL数据库版本:


选择SELECT DIRECTORY,输入@@datadir所在目录路径, 点击start


软件会扫描目录下的ibdata1或mysql.ibd并扫描@datadir所在磁盘:


之后点击dropped databases节点,可以找到相关被drop删除的数据库子节点,并恢复其中的表数据:


针对drop table 及 truncate table 场景的恢复


以下恢复步骤即适用于drop table 也适用于 truncate table

mysql> select count(*) from employees.employees;

+----------+
| count(*) |
+----------+
|   300024 |
+----------+
1 row in set (0.09 sec)

mysql> select @@datadir;
+-----------+
| @@datadir |
+-----------+
| /m01/     |
+-----------+
1 row in set (0.00 sec)

mysql> drop table employees.employees;
ERROR 1217 (23000): Cannot delete or update a parent row: a foreign key constraint fails


mysql> SET FOREIGN_KEY_CHECKS=0;
Query OK, 0 rows affected (0.00 sec)

mysql> drop table employees.employees;
Query OK, 0 rows affected (0.02 sec)

mysql> ^DBye
 
 
#sync
#sync


启动DBRECOVER FOR MYSQL软件,选择DROP TABLE恢复场景:


选择正确的MYSQL数据库版本:


选择SELECT DIRECTORY,输入@@datadir所在目录路径, 点击start


软件会扫描目录下的ibdata1或mysql.ibd并扫描@datadir所在磁盘:


!!!注意这里一定要输入原始@@datadir所在目录;不能是出现问题后拷贝原文件的一个目录。因为软件需要扫描@@datadir所在文件系统所在挂载点才能找到被drop的数据。


之后点击对应数据库下的dropped tables节点,看是否存在对应被drop的表:


针对truncate table,只需要在数据库树形图中查看对应的普通数据表节点即可看到数据,并导出数据

可以在界面右侧观察到该表的数据,之后的恢复与常规模式一致。


针对delete table场景的恢复


mysql> use  employees;
Database changed

mysql> select count(*) from employees;
+----------+
| count(*) |
+----------+
|     1000 |
+----------+
1 row in set (0.00 sec)


mysql> delete from employees;


mysql> flush table employees with read lock;
Query OK, 0 rows affected (0.01 sec)

例如以上误删除表上记录的场景,我们可以用dbrecover for mysql的undelete功能恢复。

找到该表对应的ibd文件,例如 上例中employees表对应employees.ibd。

启动dbrecover for mysql程序,在开始菜单中选择添加ibd文件,并加入该ibd文件。


右击ibd文件选择扫描,扫描后出现对应的page文件,右键选择输入建表的SQL语句。


建表语句可以通过show create table 命令在mysql中获得:


mysql> show create table employees;
+-----------+-----------------------------------------------------------------------------------------------------------------------------------------------------------------------------------------------------------------------------------------------------------------------------------------------------------------------------------------------+
| Table     | Create Table                                                                                                                                                                                                                                                                                                                                  |
+-----------+-----------------------------------------------------------------------------------------------------------------------------------------------------------------------------------------------------------------------------------------------------------------------------------------------------------------------------------------------+
| employees | CREATE TABLE `employees` (
  `emp_no` int(11) NOT NULL,
  `birth_date` date NOT NULL,
  `first_name` varchar(14) NOT NULL,
  `last_name` varchar(16) NOT NULL,
  `gender` enum('M','F') NOT NULL,
  `hire_date` date NOT NULL,
  PRIMARY KEY (`emp_no`)
) ENGINE=InnoDB DEFAULT CHARSET=utf8mb4 COLLATE=utf8mb4_0900_ai_ci ROW_FORMAT=DYNAMIC |
+-----------+-----------------------------------------------------------------------------------------------------------------------------------------------------------------------------------------------------------------------------------------------------------------------------------------------------------------------------------------------+
1 row in set (0.01 sec)


点击确定后,界面右侧出现表信息,点击deleted数据:


点击导出到文件,即可将delete掉的数据恢复为MYSQLDUMP形式的INSERT语句


FRM文件的恢复场景

FRM文件的读取恢复功能是DBRECOVER FOR MYSQL的免费功能。

在某些场景下我们需要从MYSQL的FRM文件中获得建表语句,只需要在软件主界面下选择添加frm文件:


双击加入的frm文件或右键查看文件,可以在右侧界面看到该FRM文件对应的建表语句,用户可复制该语句。


检查数据表上可恢复的行数

在恢复场景中,用户可以通过该功能了解某张表所能恢复的记录数量。

选中数据表,右键选择Show Table Recoverable Row Count:

MySQL 5.7在Ubuntu 18.04上快速安装 不依赖于APT源脚本

wget https://www.dropbox.com/s/uvmtsd1lqpoju8l/libaio1_0.3.112-5_amd64.deb
wget https://www.dropbox.com/s/tiwi2qhhptpgljm/libmecab2_0.996-6_amd64.deb
wget https://www.dropbox.com/s/nem5b480tckdxx9/libssl1.1_1.1.1c-1ubuntu4_amd64.deb
wget https://www.dropbox.com/s/vrzyqn140cfz77k/mysql-server_5.7.29-1ubuntu18.04_amd64.deb-bundle.tar

tar -xvf mysql-server*.tar
dpkg -i libaio1_0.3.112-5_amd64.deb
dpkg -i libmecab2_0.996-6_amd64.deb 
dpkg -i libssl1.1_1.1.1c-1ubuntu4_amd64.deb
# touch /etc/mysql/my.cnf.fallback
dpkg -i mysql-common_*.deb
dpkg -i mysql-community-client*
dpkg -i mysql-client*
dpkg-preconfigure mysql-community-server_*
dpkg -i mysql-community-server*

MySQL 5.7在Ubuntu 18.04上移动数据文件目录DATADIR

注意由于apparmor的存在,以及mysql-systemd-start脚本的影响,导致在Ubuntu上移动MYSQL DATADIR有一些小问题。


步骤0 创建目标目录; 移动数据文件目录,常见的原因有 移动数据到新磁盘或逻辑卷等


例如目标目录路径是 /m01/mysql

mkdir -p /m01/mysql
chown mysql:mysql /m01
chown mysql:mysql /m01/mysql


步骤1 确认datadir

su - root 

mysql -u root -p

select @@datadir;
+-----------------+
| @@datadir       |
+-----------------+
| /var/lib/mysql/ |
+-----------------+
1 row in set (0.00 sec)


关闭MYSQL实例守护进程

systemctl stop mysql

确认状态

systemctl status mysql


步骤2 同步数据文件到新目录 


rsync -av /var/lib/mysql /m01


将原目录归档为备份

mv /var/lib/mysql /var/lib/mysql.bak


步骤3 对/etc/mysql/mysql.conf.d/mysqld.cnf参数文件修改datadir 参数 


vi /etc/mysql/mysql.conf.d/mysqld.cnf

修改datadir参数为

datadir         = /m01/mysql


步骤4 禁用apparmor 的mysql profile


aa-status |grep mysql
ln -s /etc/apparmor.d/usr.sbin.mysqld /etc/apparmor.d/disable/
apparmor_parser -R /etc/apparmor.d/usr.sbin.mysqld


重启 apparmor

 systemctl restart apparmor

aa-status |grep mysql

//aa-status |grep mysql 应当无结果


步骤5  针对mysql-systemd-start中的默认路径问题 创建原目录 

mkdir /var/lib/mysql/mysql -p


步骤6 重启mysql实例

systemctl start mysql
systemctl status mysql

mysql -u root -p

确认datadir

select @@datadir;


沪ICP备14014813号-2

沪公网安备 31010802001379号