Exadata下新建DiskGroup

Exadata下新建Asm Diskgroup 的步骤大致如下:


1.使用dcli -g /home/oracle/cell_group -l root cellcli -e list griddisk 命令找出active的griddisk


[root@dm01db01 ~]# dcli -g /home/oracle/cell_group -l root cellcli -e list griddisk
dm01cel01: DATA_DM01_CD_00_dm01cel01     active
dm01cel01: DATA_DM01_CD_01_dm01cel01     active
dm01cel01: DATA_DM01_CD_02_dm01cel01     active
dm01cel01: DATA_DM01_CD_03_dm01cel01     active
dm01cel01: DATA_DM01_CD_04_dm01cel01     active
dm01cel01: DATA_DM01_CD_05_dm01cel01     active
dm01cel01: DATA_DM01_CD_06_dm01cel01     active
dm01cel01: DATA_DM01_CD_07_dm01cel01     active
dm01cel01: DATA_DM01_CD_08_dm01cel01     active
dm01cel01: DATA_DM01_CD_09_dm01cel01     active
dm01cel01: DATA_DM01_CD_10_dm01cel01     active
dm01cel01: DATA_DM01_CD_11_dm01cel01     active
dm01cel01: DBFS_DG_CD_02_dm01cel01       active
dm01cel01: DBFS_DG_CD_03_dm01cel01       active
dm01cel01: DBFS_DG_CD_04_dm01cel01       active
dm01cel01: DBFS_DG_CD_05_dm01cel01       active
dm01cel01: DBFS_DG_CD_06_dm01cel01       active
dm01cel01: DBFS_DG_CD_07_dm01cel01       active
dm01cel01: DBFS_DG_CD_08_dm01cel01       active
dm01cel01: DBFS_DG_CD_09_dm01cel01       active
dm01cel01: DBFS_DG_CD_10_dm01cel01       active
dm01cel01: DBFS_DG_CD_11_dm01cel01       active
dm01cel01: RECO_DM01_CD_00_dm01cel01     active
dm01cel01: RECO_DM01_CD_01_dm01cel01     active
dm01cel01: RECO_DM01_CD_02_dm01cel01     active
dm01cel01: RECO_DM01_CD_03_dm01cel01     active
dm01cel01: RECO_DM01_CD_04_dm01cel01     active
dm01cel01: RECO_DM01_CD_05_dm01cel01     active
dm01cel01: RECO_DM01_CD_06_dm01cel01     active
dm01cel01: RECO_DM01_CD_07_dm01cel01     active
dm01cel01: RECO_DM01_CD_08_dm01cel01     active
dm01cel01: RECO_DM01_CD_09_dm01cel01     active
dm01cel01: RECO_DM01_CD_10_dm01cel01     active
dm01cel01: RECO_DM01_CD_11_dm01cel01     active
dm01cel02: DATA_DM01_CD_00_dm01cel02     active
dm01cel02: DATA_DM01_CD_01_dm01cel02     active
dm01cel02: DATA_DM01_CD_02_dm01cel02     active
dm01cel02: DATA_DM01_CD_03_dm01cel02     active
dm01cel02: DATA_DM01_CD_04_dm01cel02     active
dm01cel02: DATA_DM01_CD_05_dm01cel02     active
dm01cel02: DATA_DM01_CD_06_dm01cel02     active
dm01cel02: DATA_DM01_CD_07_dm01cel02     active
dm01cel02: DATA_DM01_CD_08_dm01cel02     active
dm01cel02: DATA_DM01_CD_09_dm01cel02     active
dm01cel02: DATA_DM01_CD_10_dm01cel02     active
dm01cel02: DATA_DM01_CD_11_dm01cel02     active
dm01cel02: DBFS_DG_CD_02_dm01cel02       active
dm01cel02: DBFS_DG_CD_03_dm01cel02       active
dm01cel02: DBFS_DG_CD_04_dm01cel02       active
dm01cel02: DBFS_DG_CD_05_dm01cel02       active
dm01cel02: DBFS_DG_CD_06_dm01cel02       active
dm01cel02: DBFS_DG_CD_07_dm01cel02       active
dm01cel02: DBFS_DG_CD_08_dm01cel02       active
dm01cel02: DBFS_DG_CD_09_dm01cel02       active
dm01cel02: DBFS_DG_CD_10_dm01cel02       active
dm01cel02: DBFS_DG_CD_11_dm01cel02       active
dm01cel02: RECO_DM01_CD_00_dm01cel02     active
dm01cel02: RECO_DM01_CD_01_dm01cel02     active
dm01cel02: RECO_DM01_CD_02_dm01cel02     active
dm01cel02: RECO_DM01_CD_03_dm01cel02     active
dm01cel02: RECO_DM01_CD_04_dm01cel02     active
dm01cel02: RECO_DM01_CD_05_dm01cel02     active
dm01cel02: RECO_DM01_CD_06_dm01cel02     active
dm01cel02: RECO_DM01_CD_07_dm01cel02     active
dm01cel02: RECO_DM01_CD_08_dm01cel02     active
dm01cel02: RECO_DM01_CD_09_dm01cel02     active
dm01cel02: RECO_DM01_CD_10_dm01cel02     active
dm01cel02: RECO_DM01_CD_11_dm01cel02     active
dm01cel03: DATA_DM01_CD_00_dm01cel03     active
dm01cel03: DATA_DM01_CD_01_dm01cel03     active
dm01cel03: DATA_DM01_CD_02_dm01cel03     active
dm01cel03: DATA_DM01_CD_03_dm01cel03     active
dm01cel03: DATA_DM01_CD_04_dm01cel03     active
dm01cel03: DATA_DM01_CD_05_dm01cel03     active
dm01cel03: DATA_DM01_CD_06_dm01cel03     active
dm01cel03: DATA_DM01_CD_07_dm01cel03     active
dm01cel03: DATA_DM01_CD_08_dm01cel03     active
dm01cel03: DATA_DM01_CD_09_dm01cel03     active
dm01cel03: DATA_DM01_CD_10_dm01cel03     active
dm01cel03: DATA_DM01_CD_11_dm01cel03     active
dm01cel03: DBFS_DG_CD_02_dm01cel03       active
dm01cel03: DBFS_DG_CD_03_dm01cel03       active
dm01cel03: DBFS_DG_CD_04_dm01cel03       active
dm01cel03: DBFS_DG_CD_05_dm01cel03       active
dm01cel03: DBFS_DG_CD_06_dm01cel03       active
dm01cel03: DBFS_DG_CD_07_dm01cel03       active
dm01cel03: DBFS_DG_CD_08_dm01cel03       active
dm01cel03: DBFS_DG_CD_09_dm01cel03       active
dm01cel03: DBFS_DG_CD_10_dm01cel03       active
dm01cel03: DBFS_DG_CD_11_dm01cel03       active
dm01cel03: RECO_DM01_CD_00_dm01cel03     active
dm01cel03: RECO_DM01_CD_01_dm01cel03     active
dm01cel03: RECO_DM01_CD_02_dm01cel03     active
dm01cel03: RECO_DM01_CD_03_dm01cel03     active
dm01cel03: RECO_DM01_CD_04_dm01cel03     active
dm01cel03: RECO_DM01_CD_05_dm01cel03     active
dm01cel03: RECO_DM01_CD_06_dm01cel03     active
dm01cel03: RECO_DM01_CD_07_dm01cel03     active
dm01cel03: RECO_DM01_CD_08_dm01cel03     active
dm01cel03: RECO_DM01_CD_09_dm01cel03     active
dm01cel03: RECO_DM01_CD_10_dm01cel03     active
dm01cel03: RECO_DM01_CD_11_dm01cel03     active

注意若没有符合要求的griddisk, 你可以使用’cellcli -e drop griddisk’ 和’cellcli -e create griddisk’命令重建griddisk ,但是不要轻易drop DBFS_DG开头的griddisk

2.登陆ASM实例后create disk group

如果不知道CELL的IP,可以从下面的配置文件中找到


[root@dm01db02 ~]# cat /etc/oracle/cell/network-config/cellip.ora 
cell="192.168.64.131"
cell="192.168.64.132"
cell="192.168.64.133"

SQL> create diskgroup DATA_MAC normal  redundancy 
  2  DISK
  3  'o/192.168.64.131/RECO_DM01_CD_*_dm01cel01'
  4  ,'o/192.168.64.132/RECO_DM01_CD_*_dm01cel02'
  5  ,'o/192.168.64.133/RECO_DM01_CD_*_dm01cel03'
  6  attribute
  7  'AU_SIZE'='4M',
  8  'CELL.SMART_SCAN_CAPABLE'='TRUE',
  9  'compatible.rdbms'='11.2.0.2',
 10  'compatible.asm'='11.2.0.2'
 11  /

3. MOUNT 新建的DISKGROUP

ALTER DISKGROUP DATA_MAC mount ;

4.或使用crsctl start/stop resource ora.DATA_MAC.dg 控制该资源

Oracle Sun Exadata V2 ,X2-2,X2-8 主要配置对比

  v2 Full Rack x2-2 Full Rack x2-8 Full Rack
Database servers 8 x Sun Fire x4170 1U 8 x Sun Fire x4170 M2 1U 2 x Sun Fire x4800 5U
Database CPUs Xeon E5540 quad core 2.53GHz Xeon X5670 six cores 2.93GHz Xeon X7560 eight cores 2.26GHz
database cores 64 96 128
database RAM 576GB 768GB 2TB
Storage cells 14 x SunFire X4275 14 x SunFire X4270 M2 14 x SunFire X4270 M2
storage cell CPUs Xeon E5540 quad core 2.53GHz Xeon L5640 six cores 2.26GHz Xeon L5640 six cores 2.26GHz
storage cells CPU cores 112 168 168
IO performance & capacity 15K RPM 600GB SAS or 2TB SATA 7.2K RPM disks 15K RPM 600GB SAS (HP model – high performance) or 2TB SAS 7.2K RPM disks (HC model – high capacity) 15K RPM 600GB SAS (HP model – high performance) or 2TB SAS 7.2K RPM disks (HC model – high capacity)
Note that 2TB SAS are the same old 2 TB drives with new SAS electronics. (Thanks Kevin Closson for ref) Note that 2TB SAS are the same old 2 TB drives with new SAS electronics. (Thanks Kevin Closson for ref)
Flash Cache 5.3TB 5.3TB 5.3TB
Database Servers networking 4 x 1GbE x 8 servers = 32 x 1GbE 4 x 1GbE x 8 servers + 2 x 10GbE x 8 servers = 32 x 1Gb + 16 x 10GbEE 8 x 1GbE x 2 servers + 8 x 10GbE x 2 servers = 16 x 1Gb + 16 x 10GbEE
InfiniBand Switches QDR 40Gbit/s wire QDR 40Gbit/s wire QDR 40Gbit/s wire
InfiniBand ports on database servers (total) 2 ports x 8 servers = 16 ports 2 ports x 8 servers = 16 ports 8 ports x 2 servers = 16 ports
Database Servers OS Oracle Linux only Oracle Linux (possible Solaris later, still unclear) Oracle Linux or Solaris x86

Exadata Database Machine Host的操作系统OS版本

之前有同事问我Exadata用的是什么操作系统这个问题?

最早Oracle与HP合作的Exadata V1采用的是Oracle Enterprise Linux,而Oracle-Sun Exadata V2则目前还仅提供OEL,但是已经通过了Solaris -11 Express在 Exadata V2上的测试, 所以很快Exadata V2将会有Solaris的选择。

目前现有的Exadata X2-2 和 X2-8 绝大多数采用2个OEL 5的小版本:

较早出厂的使用OEL 5.3
# cat /etc/enterprise-release
Enterprise Linux Enterprise Linux Server release 5.3 (Carthage)

近期出场的使用OEL 5.5

# cat /etc/enterprise-release
Enterprise Linux Enterprise Linux Server release 5.5 (Carthage)

# uname -a
Linux vrh1.us.oracle.com 2.6.18-128.1.16.0.1.el5 #1 SMP Tue x86_64 x86_64 x86_64 GNU/Linux


The IB should be one of the compatible cards specified in Note 888828.1
If you build a backup server machine it is best tro build as close a clone of the Exadata Compute nodes as you can get.
I.e. install OEL 5 Update 5 and one of the IB cards specified in the note and you will have the correct ofed versions and kernel
This will guarantee interoperabilty and correct operation with the kernel and ofed drivers
From the doc
InfiniBand OFED Software
Exadata Storage Servers and database servers will interoperate with different InfiniBand OFED software versions, however, Oracle recommends that all versions be the same unless performing a rolling upgrade. Review Note 1262380.1 for database server software and firmware guidelines.

InfiniBand HCA
Exadata Storage Servers and database servers will interoperate with different InfiniBand host channel adapter (HCA) firmware versions, however, Oracle recommends that all versions be the same unless performing a rolling upgrade. Review Note 1262380.1 for database server software and firmware guidelines.

For a complete list of the Oracle QDR Infinband adaptors see here:

http://www.oracle.com/technetwork/documentation/oracle-net-sec-hw-190016.html#infinibandadp

For the compute nodes all firmware updates must be done via the bundle patches descibed in Doc 888828.1
So I would advise upgrading to the latest supported bundel patch.

For you backup server choose the same model card that came with the X2 compute nodes.
Install Oracle Eterprise Linux Release 5 Update 5
Upgrade the firmware to the same firmware an on the X2 or higher if not already the same,

Database Machine and Exadata Storage Server 11g Release 2 (11.2) Supported Versions [ID 888828.1]

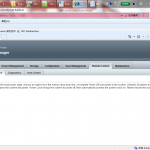
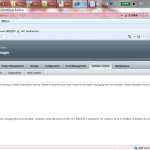
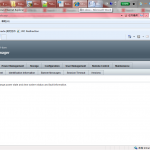
使用Exadata ILOM remote console登陆Node

使用Exadata ILOM remote console登陆Node, 如图所示:


Exadata混合列压缩如何处理INSERT和UPDATE

Hybrid Columnar Compression混合列压缩是Exadata数据库一体机的核心功能之一,与普通的高级压缩特性(advanced compression)不同,Hybrid columnar compression (HCC) 仅仅在Exadata平台上可用。使用HCC的情况下数据压缩存放在CU(compression unit压缩单位中),一个CU单位包括多个数据库块,这是出于单数据块不利于以列值压缩算法的考量所决定的,当一个CU包含多个block时可以实现较优的列值压缩算法。

同时对于普通的INSERT/UPDATE操作,需要造成对行级数据的压缩降级,即在经历UPDATE/INSERT后原本HCC压缩的行可能变成普通高级压缩的水平。


hybrid columnar compression与数据仓库行为的批量初始化导入(bulk initial load)配合,直接路径导入(direct load)例如ALTER TABLE MOVE, IMPDP或直接路径插入(append INSERT),使用HCC的前提是这些数据将不会被频繁修改或从不被修改。


当你更新混合列压缩启动的表中的数据行时,相关整个的压缩单位CU中的数据将被锁住。 被更新的这些数据将不得不从原HCC压缩级别降级到例如无压缩或for OLTP压缩的水准。


我们来看以下例子:


SQL*Plus: Release 11.2.0.2.0 Production on Wed Sep 12 06:14:53 2012

Copyright (c) 1982, 2010, Oracle.  All rights reserved.

Connected to:
Oracle Database 11g Enterprise Edition Release 11.2.0.2.0 - Production
With the Partitioning, Automatic Storage Management, OLAP, Data Mining
and Real Application Testing options

SQL> grant dba to scott;

Grant succeeded.

SQL> conn scott/oracle
Connected.
SQL> 
SQL> create table hcc_maclean tablespace users compress for query high as select * from dba_objects;

Table created.

  1* select rowid,owner,object_name,dbms_rowid.rowid_block_number(rowid) from hcc_maclean where owner='MACLEAN'
SQL> /

ROWID                          OWNER                          OBJECT_NAME          DBMS_ROWID.ROWID_BLOCK_NUMBER(ROWID)
------------------------------ ------------------------------ -------------------- ------------------------------------
AAAThuAAEAAAHTJAOI             MACLEAN                        SALES                                               29897
AAAThuAAEAAAHTJAOJ             MACLEAN                        MYCUSTOMERS                                         29897
AAAThuAAEAAAHTJAOK             MACLEAN                        MYCUST_ARCHIVE                                      29897
AAAThuAAEAAAHTJAOL             MACLEAN                        MYCUST_QUERY                                        29897
AAAThuAAEAAAHTJAOh             MACLEAN                        COMPRESS_QUERY                                      29897
AAAThuAAEAAAHTJAOi             MACLEAN                        UNCOMPRESS                                          29897
AAAThuAAEAAAHTJAOj             MACLEAN                        CHAINED_ROWS                                        29897
AAAThuAAEAAAHTJAOk             MACLEAN                        COMPRESS_QUERY1                                     29897

8 rows selected.

select dbms_rowid.rowid_block_number(rowid),dbms_rowid.rowid_relative_fno(rowid) from hcc_maclean where owner='MACLEAN';

session A:

update hcc_maclean set OBJECT_NAME=OBJECT_NAME||'DBM' where rowid='AAAThuAAEAAAHTJAOI';

session B:

update hcc_maclean set OBJECT_NAME=OBJECT_NAME||'DBM' where rowid='AAAThuAAEAAAHTJAOJ';

SQL> select sid,wait_event_text,BLOCKER_SID from v$wait_chains;

       SID WAIT_EVENT_TEXT                                                  BLOCKER_SID
---------- ---------------------------------------------------------------- -----------
        13 enq: TX - row lock contention                                            136
       136 SQL*Net message from client

可以看到session A block B,这验证了HCC压缩后update row所在CU会造成整个CU被锁住的说法

SQL> alter system checkpoint;

System altered.

SQL> /     

System altered.

SQL> alter system dump datafile 4 block 29897
  2  ;

  Block header dump:  0x010074c9
 Object id on Block? Y
 seg/obj: 0x1386e  csc: 0x00.1cad7e  itc: 3  flg: E  typ: 1 - DATA
     brn: 0  bdba: 0x10074c8 ver: 0x01 opc: 0
     inc: 0  exflg: 0

 Itl           Xid                  Uba         Flag  Lck        Scn/Fsc
0x01   0xffff.000.00000000  0x00000000.0000.00  C---    0  scn 0x0000.001cabfa
0x02   0x000a.00a.00000430  0x00c051a7.0169.17  ----    1  fsc 0x0000.00000000
0x03   0x0000.000.00000000  0x00000000.0000.00  ----    0  fsc 0x0000.00000000

avsp=0x14
tosp=0x14
        r0_9ir2=0x0
        mec_kdbh9ir2=0x0
                      76543210
        shcf_kdbh9ir2=----------
                  76543210
        flag_9ir2=--R-----      Archive compression: Y
                fcls_9ir2[0]={ }
0x16:pti[0]     nrow=1  offs=0
0x1a:pri[0]     offs=0x30
block_row_dump:
tab 0, row 0, @0x30
tl: 8016 fb: --H-F--N lb: 0x2  cc: 1          ==>整个CU指向ITL 0x02
nrid:  0x010074ca.0
col  0: [8004]
Compression level: 02 (Query High)
 Length of CU row: 8004
kdzhrh: ------PC CBLK: 1 Start Slot: 00
 NUMP: 01
 PNUM: 00 POFF: 7984 PRID: 0x010074ca.0
CU header:
CU version: 0   CU magic number: 0x4b445a30
CU checksum: 0xf8faf86e
CU total length: 8694
CU flags: NC-U-CRD-OP
ncols: 15
nrows: 995
algo: 0
CU decomp length: 8487   len/value length: 100111
row pieces per row: 1
num deleted rows: 1
deleted rows: 904,
START_CU:


我们可以使用如下方式衡量row的压缩情况:


SQL> select DBMS_COMPRESSION.GET_COMPRESSION_TYPE('SCOTT','HCC_MACLEAN','AAAThuAAEAAAHTJAOk') from dual;

DBMS_COMPRESSION.GET_COMPRESSION_TYPE('SCOTT','HCC_MACLEAN','AAATHUAAEAAAHTJAOK'
--------------------------------------------------------------------------------
                                                                               4


COMP_NOCOMPRESS CONSTANT NUMBER := 1;
COMP_FOR_OLTP CONSTANT NUMBER := 2;
COMP_FOR_QUERY_HIGH CONSTANT NUMBER := 4;
COMP_FOR_QUERY_LOW CONSTANT NUMBER := 8;
COMP_FOR_ARCHIVE_HIGH CONSTANT NUMBER := 16;
COMP_FOR_ARCHIVE_LOW CONSTANT NUMBER := 32;

COMP_RATIO_MINROWS CONSTANT NUMBER := 1000000;
COMP_RATIO_ALLROWS CONSTANT NUMBER := -1;

上表列出了压缩类型的常数值,例如COMP_FOR_QUERY_HIGH是4,COMP_FOR_QUERY_LOW 是8

这里我们从上述查询GET_COMPRESSION_TYPE指定rowid的情况下得到的是4说明该列以COMP_FOR_QUERY_HIGH形式压缩:


SQL>  update hcc_maclean set OBJECT_NAME=OBJECT_NAME||'DBM' where owner='MACLEAN';

8 rows updated.

SQL> commit;

Commit complete.


SQL>  select DBMS_COMPRESSION.GET_COMPRESSION_TYPE('SCOTT','HCC_MACLEAN',rowid) from HCC_MACLEAN where owner='MACLEAN';

DBMS_COMPRESSION.GET_COMPRESSION_TYPE('SCOTT','HCC_MACLEAN',ROWID)
------------------------------------------------------------------
                                                                 1
                                                                 1
                                                                 1
                                                                 1
                                                                 1
                                                                 1
                                                                 1
                                                                 1

8 rows selected.

以上更新一定量数据后可以看到COMPRESSION_TYPE由COMP_FOR_QUERY_HIGH降级为COMP_NOCOMPRESS,这说明这张表虽然compress for query high但部分数据在更新后实际不再被压缩。

在11g中这些非压缩态复萌的数据行不会自动升级成HCC状态。必要的时候手动作 ALTER TABLE MOVE或在线重定义以便将非压缩态的数据转换回HCC状态。


SQL>  ALTER TABLE hcc_MACLEAN move COMPRESS FOR ARCHIVE HIGH;

Table altered.

SQL> select DBMS_COMPRESSION.GET_COMPRESSION_TYPE('SCOTT','HCC_MACLEAN',rowid) from HCC_MACLEAN where owner='MACLEAN';

DBMS_COMPRESSION.GET_COMPRESSION_TYPE('SCOTT','HCC_MACLEAN',ROWID)
------------------------------------------------------------------
                                                                16
                                                                16
                                                                16
                                                                16
                                                                16
                                                                16
                                                                16
                                                                16

8 rows selected.

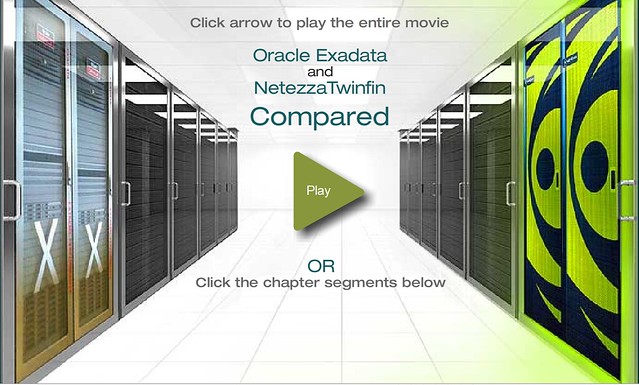
数据仓库:Oracle Exadata和Netezza的比较

虽然都是王婆卖瓜,但胜在他山之石可以攻玉,了解一下Exadata 之外的 一体机选择。


oracle_exadata_netezzaTwinfin_compared


Exadata用户的困境

当然这是Oracle-Sun Exadata V2 数据库一体机的竞争者,Netezza公司制作的一个小视频,但并非空穴来风!


很多人告诉我有了Exadata这么智能的一体机后都可以不需要dba了,那么这是事实吗?


就我个人的体验,部署了Exadata之后DBA花在管理上的时间更多了。


Exadata上复杂的数据库升级步骤:

Infiniband Switch – > Exadata Storage Software – > Exadata Host Minimal Patch -> Grid Infrastructure – > Database

客户视角的Exadata 详细升级过程:

  1. Exadata Cells from 11.2.1.3.1 to 11.2.2.2.0
  2. Exadata database nodes from 11.2.1.3.1 to 11.2.2.2.0
  3. Applying a number of pre and post patching fixes (addendums to the standard patching instructions,probably included due to customer reported issue with eth patching
  4. Upgrade kernel on database nodes
  5. Upgrade GI Home to 11.2.0.2
  6. Upgrade ALL RDBMS Homes to 11.2.0.2
  7. Upgrade the database to 11.2.0.2
  8. Apply 11.2.0.2 BP2 to ALL Homes(Part of this need to be done manually ,as opatch auto doesn’t work when the installation has different GI and RDBMS owners)


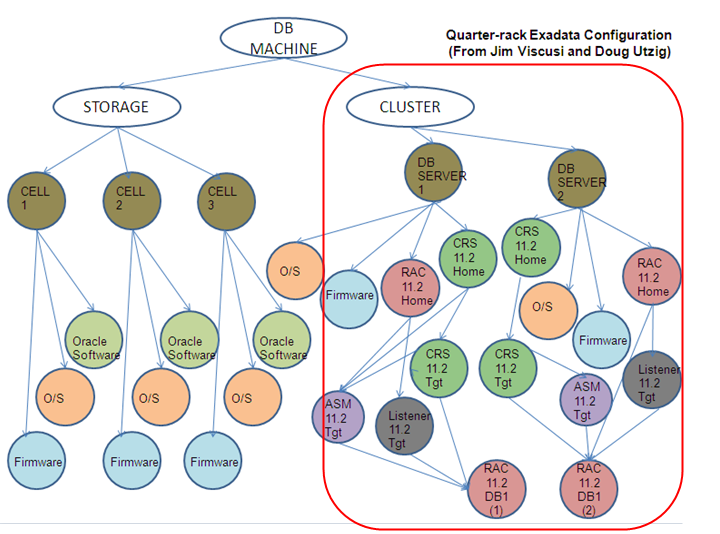
升级所涉及的多层Component :

这升级步骤不是人写的,有木有?!

Exadata上的 Bundle Patch (Replaces recalled patch 8626760) 是可以recall 召回的有木有?!

#别去搜这个patch,说了recall了就是不会让你能找到了!

号称出厂即最优的配置,结果连简单的ulimit-memlock参数设置都有问题的情况,有木有?


昨天客户语重心长的告诉我,他们准备把Exadata V2 上的核心应用迁移走,客户在09年就开始用Exadata,是不是国内第一家我不知道,但至少应该是用于生产的第一批。但是这2年来因为Exadata折 腾了无数次,现在终于不想折腾了。实际是用户在测试Exadata时总是能看到其优点,但实际使用时只看到缺点了!

历数Exadata V2数据库一体机的几大致命缺点

  1. 软硬件一体,耦合过于紧密
  2. 升级操作十分复杂,客户看到升级流程后几乎绝望
  3. 国内使用经验贫乏
  4. support只有Oracle自己一家,没有第三方可选
  5. 就以往的表现来看美国支撑的X team并不给力。。。。。。
  6. 贵,Exadata很贵!具体了解其报价Exadata V2 Pricing

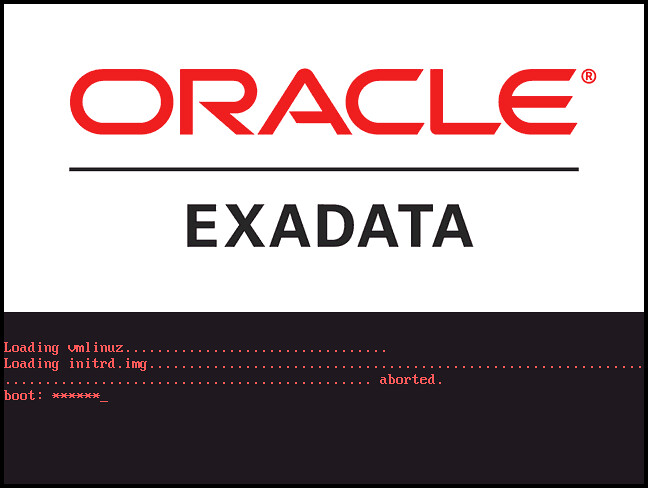
Booting Exadata!

Booting Exadata! It’s a joke here!.

exadata_boot

Exadata上oracle binary的make日志

Exadata上oracle binary的make日志 如下:

Shutdown all running database instances
As root user, unlock the GI home
# /crs/install/rootcrs.pl -unlock 
As the owner of the GI software, link in the RDS protocol in the GI software home (set ORACLE_HOME properly first) 
$ cd /rdbms/lib
$ make -f ins_rdbms.mk ipc_rds ioracle
As the owner of the RDBMS software, link in the RDS protocol in the RDBMS software homes (set ORACLE_HOME properly first) 
$ cd /rdbms/lib
$ make -f ins_rdbms.mk ipc_rds ioracle

 - Linking Oracle
rm -f /u01/app/oracle/product/11.2.0/dbhome_1/rdbms/lib/oracle
gcc  -o /u01/app/oracle/product/11.2.0/dbhome_1/rdbms/lib/oracle -m64 -L/u01/app/oracle/product/11.2.0/dbhome_1/rdbms/lib/ -L/u01/app/oracle/product/11.2.0/dbhome_1/lib/ -L/u01/app/oracle/product/11.2.0/dbhome_1/lib/stubs/   -Wl,-E /u01/app/oracle/product/11.2.0/dbhome_1/rdbms/lib/opimai.o /u01/app/oracle/product/11.2.0/dbhome_1/rdbms/lib/ssoraed.o /u01/app/oracle/product/11.2.0/dbhome_1/rdbms/lib/ttcsoi.o  -Wl,--whole-archive -lperfsrv11 -Wl,--no-whole-archive /u01/app/oracle/product/11.2.0/dbhome_1/lib/nautab.o /u01/app/oracle/product/11.2.0/dbhome_1/lib/naeet.o /u01/app/oracle/product/11.2.0/dbhome_1/lib/naect.o /u01/app/oracle/product/11.2.0/dbhome_1/lib/naedhs.o /u01/app/oracle/product/11.2.0/dbhome_1/rdbms/lib/config.o  -lserver11 -lodm11 -lcell11 -lnnet11 -lskgxp11 -lsnls11 -lnls11  -lcore11 -lsnls11 -lnls11 -lcore11 -lsnls11 -lnls11 -lxml11 -lcore11 -lunls11 -lsnls11 -lnls11 -lcore11 -lnls11 -lclient11  -lvsn11 -lcommon11 -lgeneric11 -lknlopt `if /usr/bin/ar tv /u01/app/oracle/product/11.2.0/dbhome_1/rdbms/lib/libknlopt.a | grep xsyeolap.o > /dev/null 2>&1 ; then echo "-loraolap11" ; fi` -lslax11 -lpls11  -lrt -lplp11 -lserver11 -lclient11  -lvsn11 -lcommon11 -lgeneric11 `if [ -f /u01/app/oracle/product/11.2.0/dbhome_1/lib/libavserver11.a ] ; then echo "-lavserver11" ; else echo "-lavstub11"; fi` `if [ -f /u01/app/oracle/product/11.2.0/dbhome_1/lib/libavclient11.a ] ; then echo "-lavclient11" ; fi` -lknlopt -lslax11 -lpls11  -lrt -lplp11 -ljavavm11 -lserver11  -lwwg  `cat /u01/app/oracle/product/11.2.0/dbhome_1/lib/ldflags`    -lncrypt11 -lnsgr11 -lnzjs11 -ln11 -lnl11 -lnro11 `cat /u01/app/oracle/product/11.2.0/dbhome_1/lib/ldflags`    -lncrypt11 -lnsgr11 -lnzjs11 -ln11 -lnl11 -lnnz11 -lzt11 -lztkg11 -lmm -lsnls11 -lnls11  -lcore11 -lsnls11 -lnls11 -lcore11 -lsnls11 -lnls11 -lxml11 -lcore11 -lunls11 -lsnls11 -lnls11 -lcore11 -lnls11 -lztkg11 `cat /u01/app/oracle/product/11.2.0/dbhome_1/lib/ldflags`    -lncrypt11 -lnsgr11 -lnzjs11 -ln11 -lnl11 -lnro11 `cat /u01/app/oracle/product/11.2.0/dbhome_1/lib/ldflags`    -lncrypt11 -lnsgr11 -lnzjs11 -ln11 -lnl11 -lnnz11 -lzt11 -lztkg11   -lsnls11 -lnls11  -lcore11 -lsnls11 -lnls11 -lcore11 -lsnls11 -lnls11 -lxml11 -lcore11 -lunls11 -lsnls11 -lnls11 -lcore11 -lnls11 `if /usr/bin/ar tv /u01/app/oracle/product/11.2.0/dbhome_1/rdbms/lib/libknlopt.a | grep "kxmnsd.o" > /dev/null 2>&1 ; then echo " " ; else echo "-lordsdo11"; fi` -L/u01/app/oracle/product/11.2.0/dbhome_1/ctx/lib/ -lctxc11 -lctx11 -lzx11 -lgx11 -lctx11 -lzx11 -lgx11 -lordimt11 -lclsra11 -ldbcfg11 -lhasgen11 -lskgxn2 -lnnz11 -lzt11 -lxml11 -locr11 -locrb11 -locrutl11 -lhasgen11 -lskgxn2 -lnnz11 -lzt11 -lxml11  -loraz -llzopro -lorabz2 -lipp_z -lipp_bz2 -lippdcemerged -lippsemerged -lippdcmerged  -lippsmerged -lippcore  -lippcpemerged -lippcpmerged  -lsnls11 -lnls11  -lcore11 -lsnls11 -lnls11 -lcore11 -lsnls11 -lnls11 -lxml11 -lcore11 -lunls11 -lsnls11 -lnls11 -lcore11 -lnls11 -lsnls11 -lunls11  -lsnls11 -lnls11  -lcore11 -lsnls11 -lnls11 -lcore11 -lsnls11 -lnls11 -lxml11 -lcore11 -lunls11 -lsnls11 -lnls11 -lcore11 -lnls11 -lasmclnt11 -lcommon11 -lcore11 -laio    `cat /u01/app/oracle/product/11.2.0/dbhome_1/lib/sysliblist` -Wl,-rpath,/u01/app/oracle/product/11.2.0/dbhome_1/lib -lm    `cat /u01/app/oracle/product/11.2.0/dbhome_1/lib/sysliblist` -ldl -lm   -L/u01/app/oracle/product/11.2.0/dbhome_1/lib
test ! -f /u01/app/oracle/product/11.2.0/dbhome_1/bin/oracle ||\
           mv -f /u01/app/oracle/product/11.2.0/dbhome_1/bin/oracle /u01/app/oracle/product/11.2.0/dbhome_1/bin/oracleO
mv /u01/app/oracle/product/11.2.0/dbhome_1/rdbms/lib/oracle /u01/app/oracle/product/11.2.0/dbhome_1/bin/oracle
chmod 6751 /u01/app/oracle/product/11.2.0/dbhome_1/bin/oracle

Exadata X2-2 1/4 RACK并行备份测试

[root@dm01db01 ~]# imageinfo

Kernel version: 2.6.18-274.18.1.0.1.el5 #1 SMP Thu Feb 9 19:07:16 EST 2012 x86_64
Image version: 11.2.3.1.1.120607
Image activated: 2012-08-14 19:16:01 -0400
Image status: success
System partition on device: /dev/mapper/VGExaDb-LVDbSys1

rman target /

Recovery Manager: Release 11.2.0.2.0 – Production on Mon Sep 3 10:13:11 2012

Copyright (c) 1982, 2009, Oracle and/or its affiliates. All rights reserved.

RMAN> show all;

RMAN configuration parameters for database with db_unique_name DBM are:
CONFIGURE RETENTION POLICY TO REDUNDANCY 1; # default
CONFIGURE BACKUP OPTIMIZATION OFF; # default
CONFIGURE DEFAULT DEVICE TYPE TO DISK; # default
CONFIGURE CONTROLFILE AUTOBACKUP OFF; # default
CONFIGURE CONTROLFILE AUTOBACKUP FORMAT FOR DEVICE TYPE DISK TO ‘%F’; # default
CONFIGURE DEVICE TYPE DISK PARALLELISM 12 BACKUP TYPE TO BACKUPSET;
CONFIGURE DATAFILE BACKUP COPIES FOR DEVICE TYPE DISK TO 1; # default
CONFIGURE ARCHIVELOG BACKUP COPIES FOR DEVICE TYPE DISK TO 1; # default
CONFIGURE MAXSETSIZE TO UNLIMITED; # default
CONFIGURE ENCRYPTION FOR DATABASE OFF; # default
CONFIGURE ENCRYPTION ALGORITHM ‘AES128’; # default
CONFIGURE COMPRESSION ALGORITHM ‘BASIC’ AS OF RELEASE ‘DEFAULT’ OPTIMIZE FOR LOAD TRUE ; # default
CONFIGURE ARCHIVELOG DELETION POLICY TO NONE; # default
CONFIGURE SNAPSHOT CONTROLFILE NAME TO ‘/u01/app/oracle/product/11.2.0/dbhome_1/dbs/snapcf_dbm1.f’; # default

RMAN> report schema;

using target database control file instead of recovery catalog
Report of database schema for database with db_unique_name DBM

List of Permanent Datafiles
===========================
File Size(MB) Tablespace RB segs Datafile Name
—- ——– ——————– ——- ————————
1 16384 SYSTEM *** +DATA_DM01/dbm/datafile/system.256.790880171
2 16384 SYSAUX *** +DATA_DM01/dbm/datafile/sysaux.257.790880183
3 16384 UNDOTBS1 *** +DATA_DM01/dbm/datafile/undotbs1.258.790880195
4 16384 UNDOTBS2 *** +DATA_DM01/dbm/datafile/undotbs2.260.790880213
5 1024 USERS *** +DATA_DM01/dbm/datafile/users.261.790880225
6 204800 TESTEXA *** +DATA_DM01/dbm/datafile/testexa.264.792624955

TESTEXA 表空间 已被填充满
先做串行备份测试

RMAN> run
2> {
3> allocate channel c1 type disk;
4> backup as compressed backupset incremental level 0 tablespace testexa channel c1;
5> }

allocated channel: c1
channel c1: SID=589 instance=dbm1 device type=DISK

Starting backup at 03-SEP-12
channel c1: starting compressed incremental level 0 datafile backup set
channel c1: specifying datafile(s) in backup set
input datafile file number=00006 name=+DATA_DM01/dbm/datafile/testexa.264.792624955
channel c1: starting piece 1 at 03-SEP-12
channel c1: finished piece 1 at 03-SEP-12
piece handle=+RECO_DM01/dbm/backupset/2012_09_03/nnndn0_tag20120903t101448_0.295.793016089 tag=TAG20120903T101448 comment=NONE
channel c1: backup set complete, elapsed time: 00:08:25
Finished backup at 03-SEP-12
released channel: c1

备份200GB数据耗时 8分25s

使用并行度12 section size=1024MB的备份

RMAN> backup as compressed backupset section size 1024M incremental level 0 tablespace testexa;

piece handle=+RECO_DM01/dbm/backupset/2012_09_03/nnndn0_tag20120903t103006_0.493.793017075 tag=TAG20120903T103006 comment=NONE
channel ORA_DISK_5: backup set complete, elapsed time: 00:00:01
channel ORA_DISK_7: finished piece 196 at 03-SEP-12
piece handle=+RECO_DM01/dbm/backupset/2012_09_03/nnndn0_tag20120903t103006_0.494.793017075 tag=TAG20120903T103006 comment=NONE
channel ORA_DISK_7: backup set complete, elapsed time: 00:00:01
channel ORA_DISK_8: finished piece 197 at 03-SEP-12
piece handle=+RECO_DM01/dbm/backupset/2012_09_03/nnndn0_tag20120903t103006_0.495.793017075 tag=TAG20120903T103006 comment=NONE
channel ORA_DISK_8: backup set complete, elapsed time: 00:00:01
channel ORA_DISK_2: finished piece 199 at 03-SEP-12
piece handle=+RECO_DM01/dbm/backupset/2012_09_03/nnndn0_tag20120903t103006_0.497.793017075 tag=TAG20120903T103006 comment=NONE
channel ORA_DISK_2: backup set complete, elapsed time: 00:00:01
channel ORA_DISK_3: finished piece 200 at 03-SEP-12
piece handle=+RECO_DM01/dbm/backupset/2012_09_03/nnndn0_tag20120903t103006_0.498.793017075 tag=TAG20120903T103006 comment=NONE
channel ORA_DISK_3: backup set complete, elapsed time: 00:00:01
channel ORA_DISK_9: finished piece 198 at 03-SEP-12
piece handle=+RECO_DM01/dbm/backupset/2012_09_03/nnndn0_tag20120903t103006_0.496.793017075 tag=TAG20120903T103006 comment=NONE
channel ORA_DISK_9: backup set complete, elapsed time: 00:00:02
channel ORA_DISK_1: finished piece 25 at 03-SEP-12
piece handle=+RECO_DM01/dbm/backupset/2012_09_03/nnndn0_tag20120903t103006_0.323.793017059 tag=TAG20120903T103006 comment=NONE
channel ORA_DISK_1: backup set complete, elapsed time: 00:01:11
Finished backup at 03-SEP-12

耗时约90s

沪ICP备14014813号-2

沪公网安备 31010802001379号